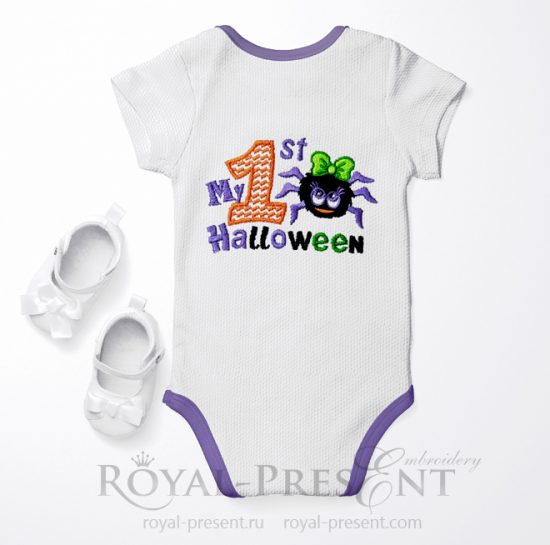
For many of us, the Halloween holiday has become special. On this day, we not only pay tribute to all saints, but also try to have fun. Each hostess prepares for Halloween in advance. She carefully selects the menu, decorates interior of the house and creates outfits for children. My first Halloween Machine embroidery design for baby girls is created for the youngest princesses who celebrate this festive for the first time.
It is ideal for dressing the smallest princesses. A beautiful and at the same time funny and bright composition will be definitely like. This design is perfect for embroidering on body, soccer, bibs or overalls.
Implementing such embroidery projects, it should be remembered that the children’s embroidery is slightly different. Let’s look at embroidery on children’s onesies and learn about the features of children’s machine embroidery.
Onesie is a popular element of your baby’s wardrobe. They are comfortable, beautiful, practical. Decorate them with machine embroidery is not difficult. The main thing is to come up with all the trifles, to choose the right embroidery technology. And only then go to the process itself.
My First Halloween Machine Embroidery Design for baby girls
Formats: .dst, .jef, .pec, .vip, .hus, .pes, .sew, .exp, .dat, .vp3, xxx
Before embroidering, it is recommended to wash and dry the product.
Then position the embroidery with a printed template and move the marks. This will make your embroidery smooth and beautiful.
As a stabilizer, it is better to use a cut-away of medium density. It is ideal for such soft and elastic fabrics. Remember that the stabilizer must be larger than the hoop size.
Turn the onesie on the wrong side. Spray the glue spray of temporary fixation onto the stabilizer web. For convenience and less contamination of the work surface, use a cardboard box. Place the stabilizer there and only then spray the glue. Glue the fabric on top. Then turn the body back.
Hoop the fabric, correlating correctly the marks on it and on the embroidery frame. Place the embroidery frame in the machine so that the needle is above the marked center. Lower the presser foot and embroider the design.
After this, turn the product to the wrong side. Cut off the excess stabilizer. It will become softer after several washings. Still remember that the skin of the baby is very sensitive. Therefore, use Cloud Cover Stitch.
It is a soft woven knit that protects the baby’s skin from irritations and allergies. In addition, it can also be used for embroidery on adult clothing.
Stick the Cloud Cover Stitch with a hot iron to the body, covering the entire area of the embroidery and stabilizer.
My first Halloween Machine embroidery design for baby girls will be the perfect decoration for your little princess’s festive garment.
You may also like
[xyz-ihs snippet=”Halloween-look-book”]

Author: Ludmila Konovalova
My name is Ludmila Konovalova, and I lead Royal Present Embroidery. Embroidery for me is more than a profession; it is a legacy of my Ukrainian and Bulgarian heritage, where every woman in my family was a virtuoso in cross-stitch and smooth stitching. This art, passed down through generations, is part of my soul and a symbol of national pride.
Date: 04.09.2018


 Get Sign-In Link
 Login with Google
 Login with Facebook
 Login with Amazon
 Login with Paypal