By knowing the speed of your embroidery machine, you can find out how long it will take to embroider a design.
To use the embroidery calculator, click on the number of stitches in the product description.
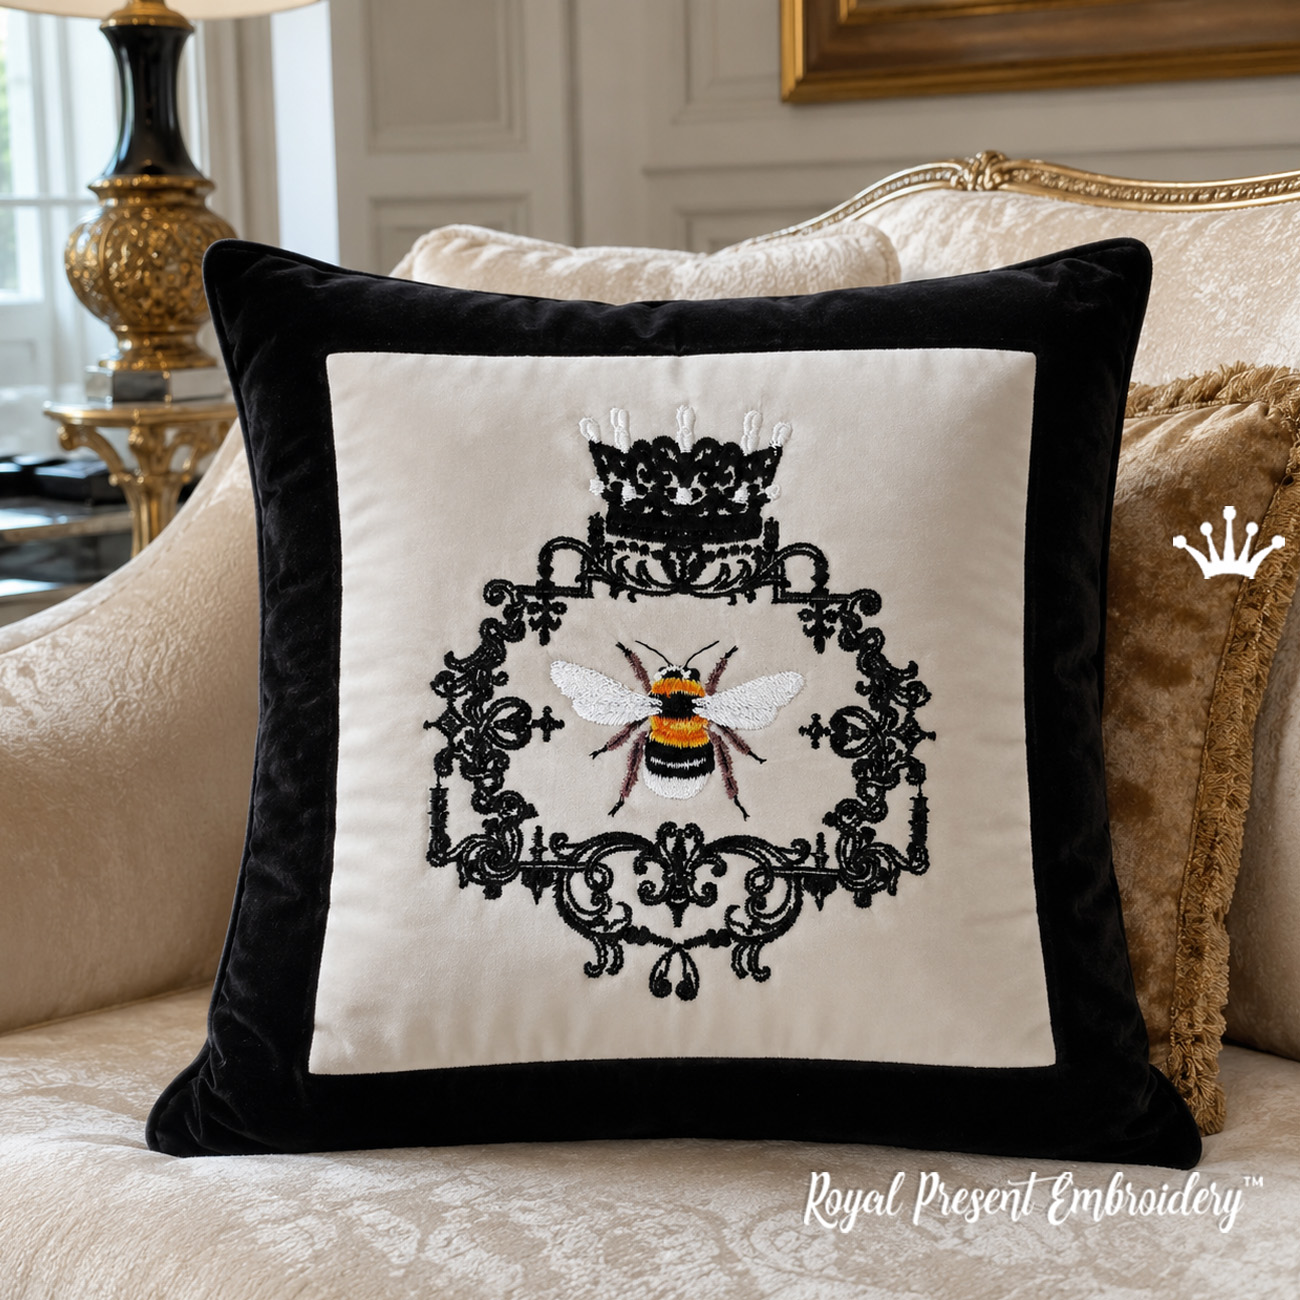
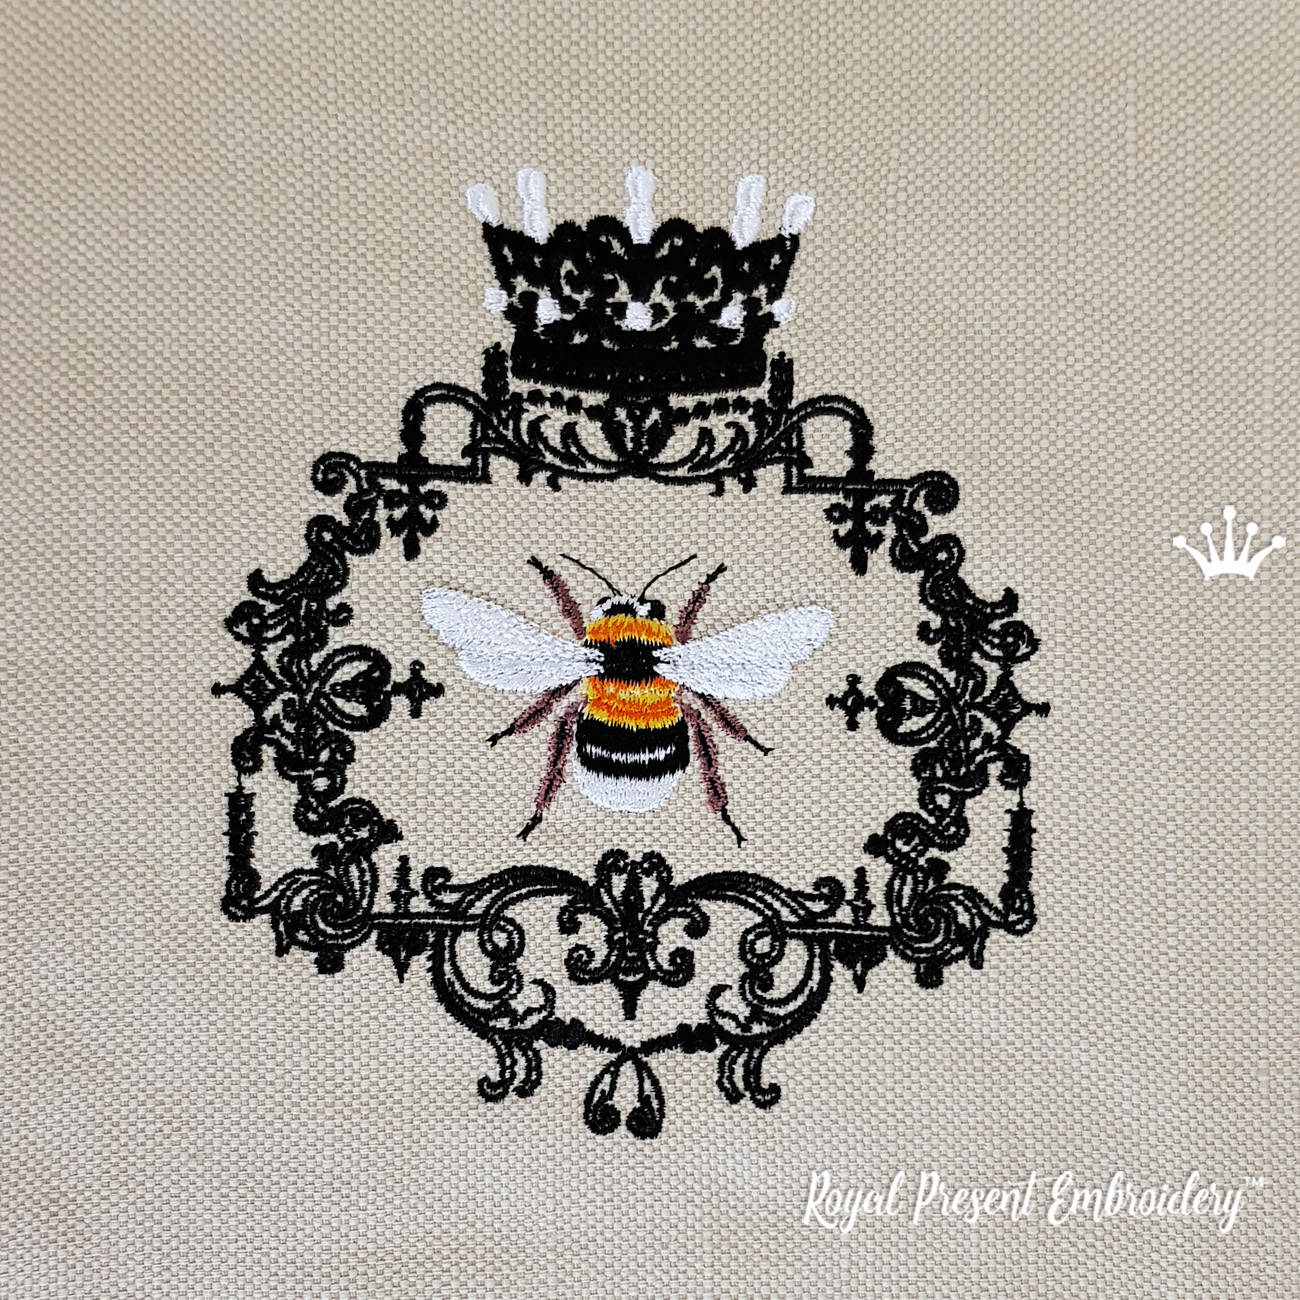
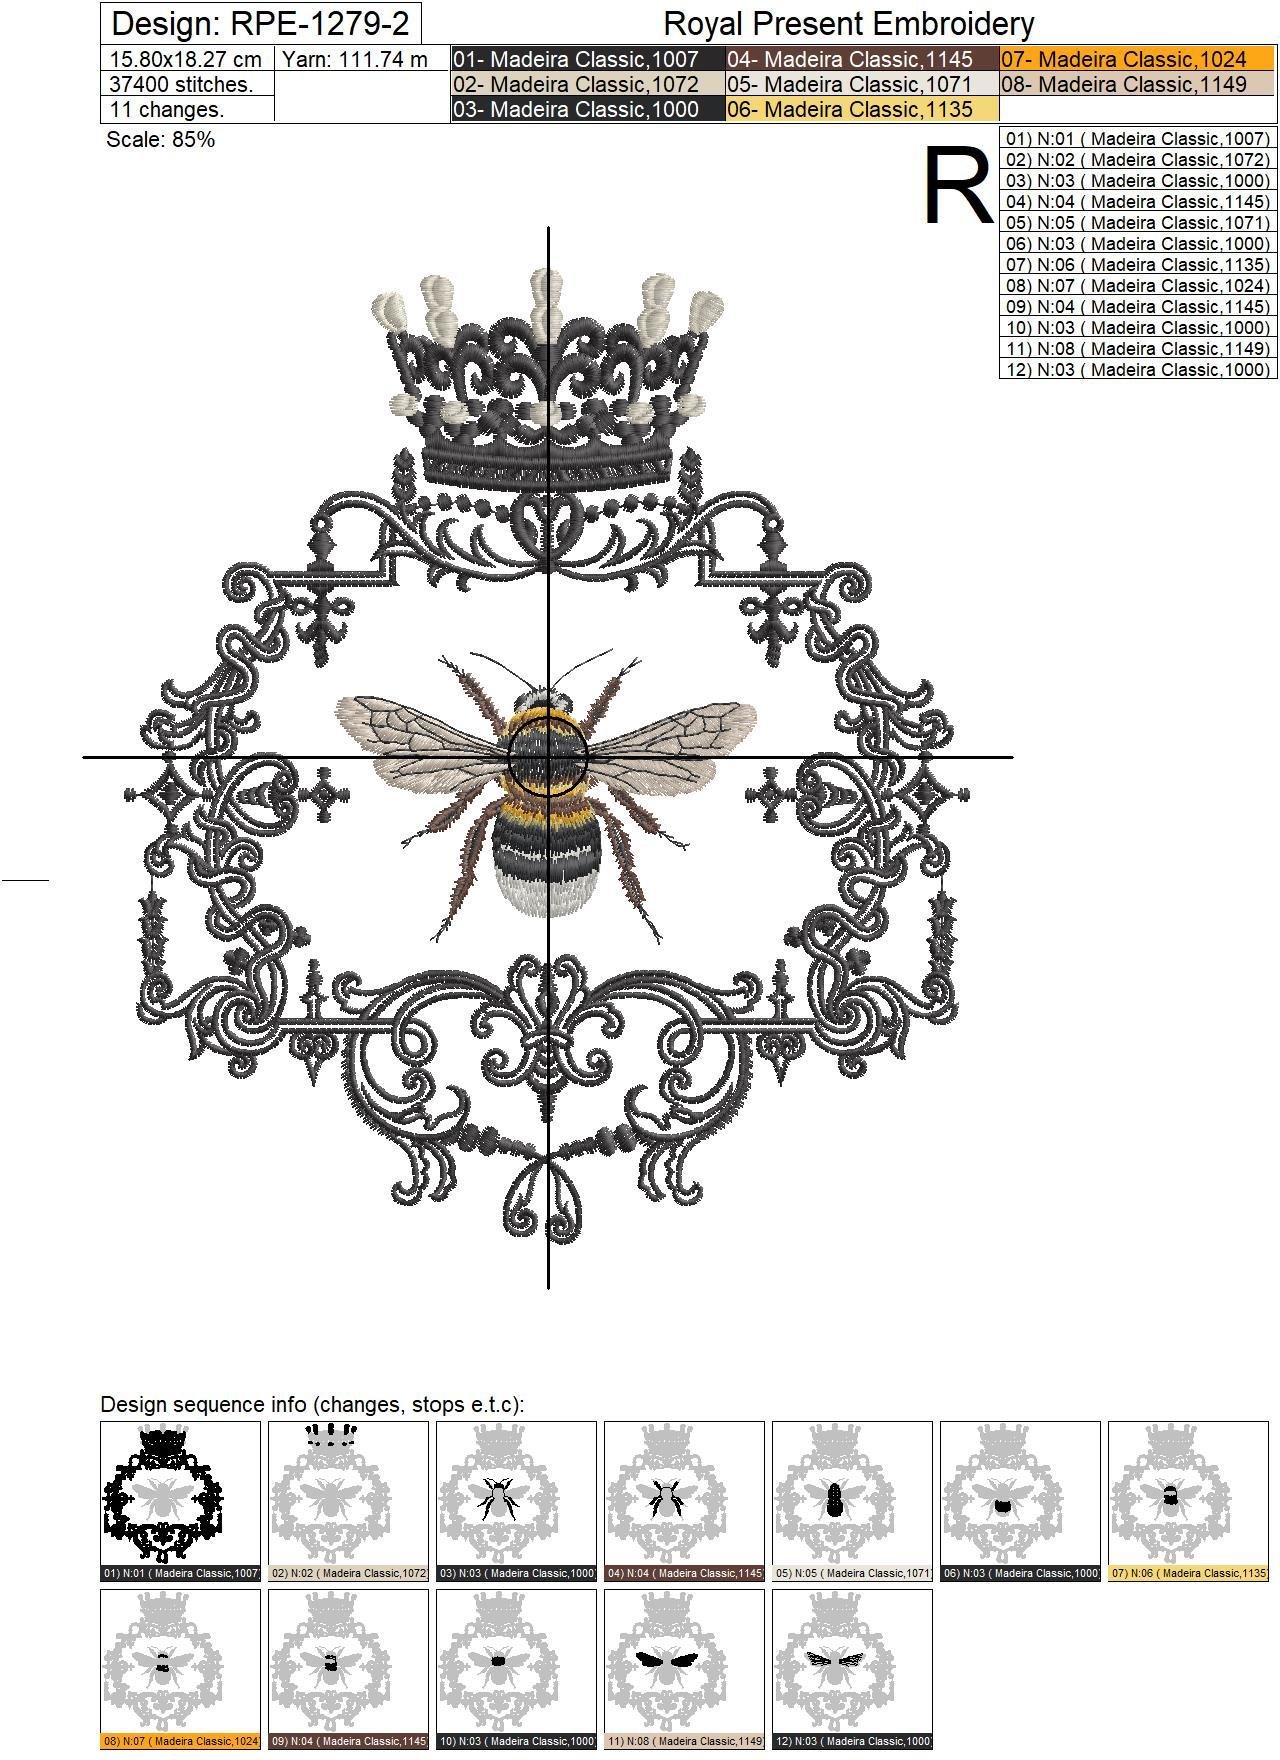
Royal Bee in a Frame Machine Embroidery Design features a detailed bee inside an ornate vintage-style frame topped with a decorative crown. Three professionally prepared sizes provide options for linen cushions, tote bags, jacket backs, table runners, upholstery panels and framed textile décor.
The product page also includes a practical fabric-weight formula for selecting embroidery backing. As a starting rule, choose a total stabilizer weight equal to approximately one-third of the fabric weight, using either grams per square meter or ounces per square yard.
This product contains files for a computerized embroidery machine. It is not a finished cushion, bag, framed panel, garment, patch or other physical product.
Product Details
Formats: .dst, .jef, .pec, .vip, .hus, .pes, .sew, .exp, .dat, xxx, tab
What Does the Design Include?
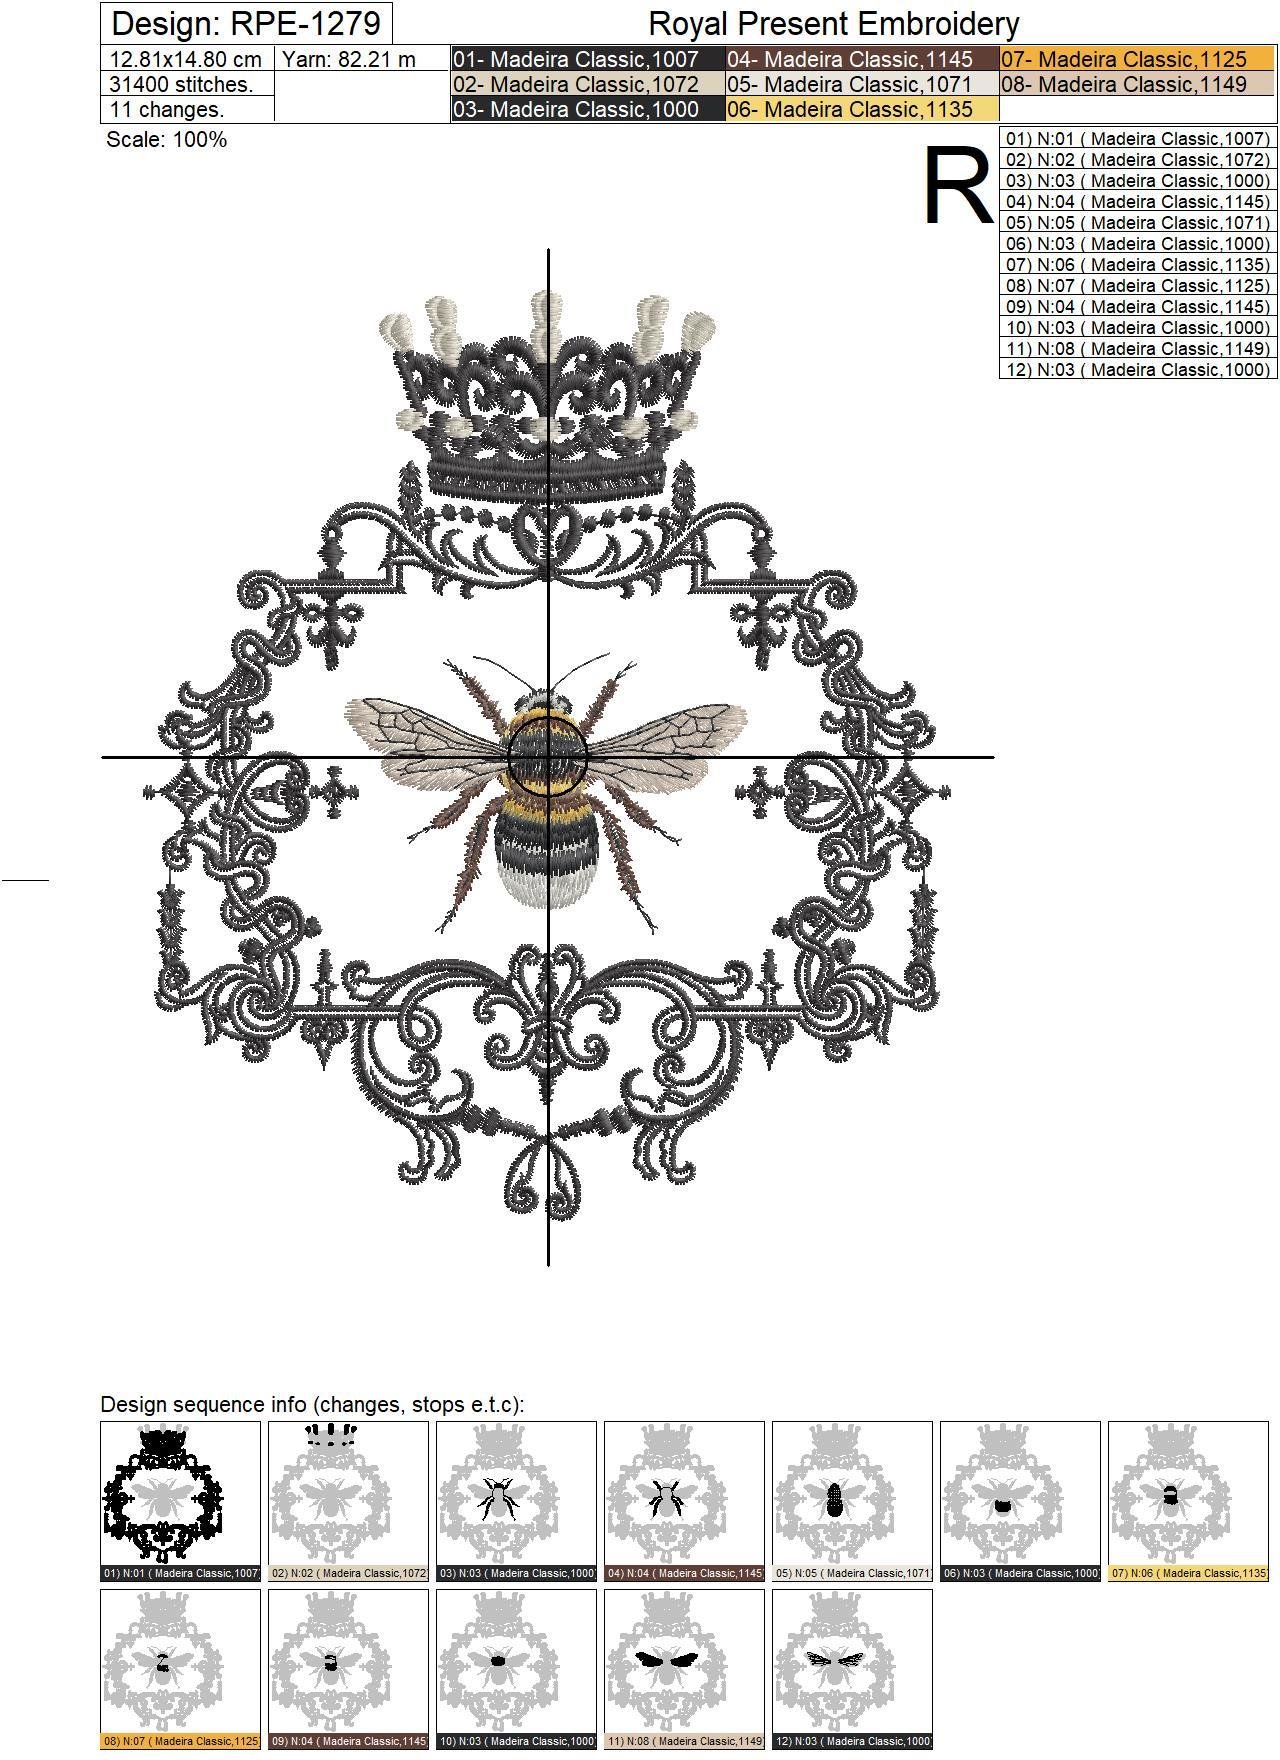
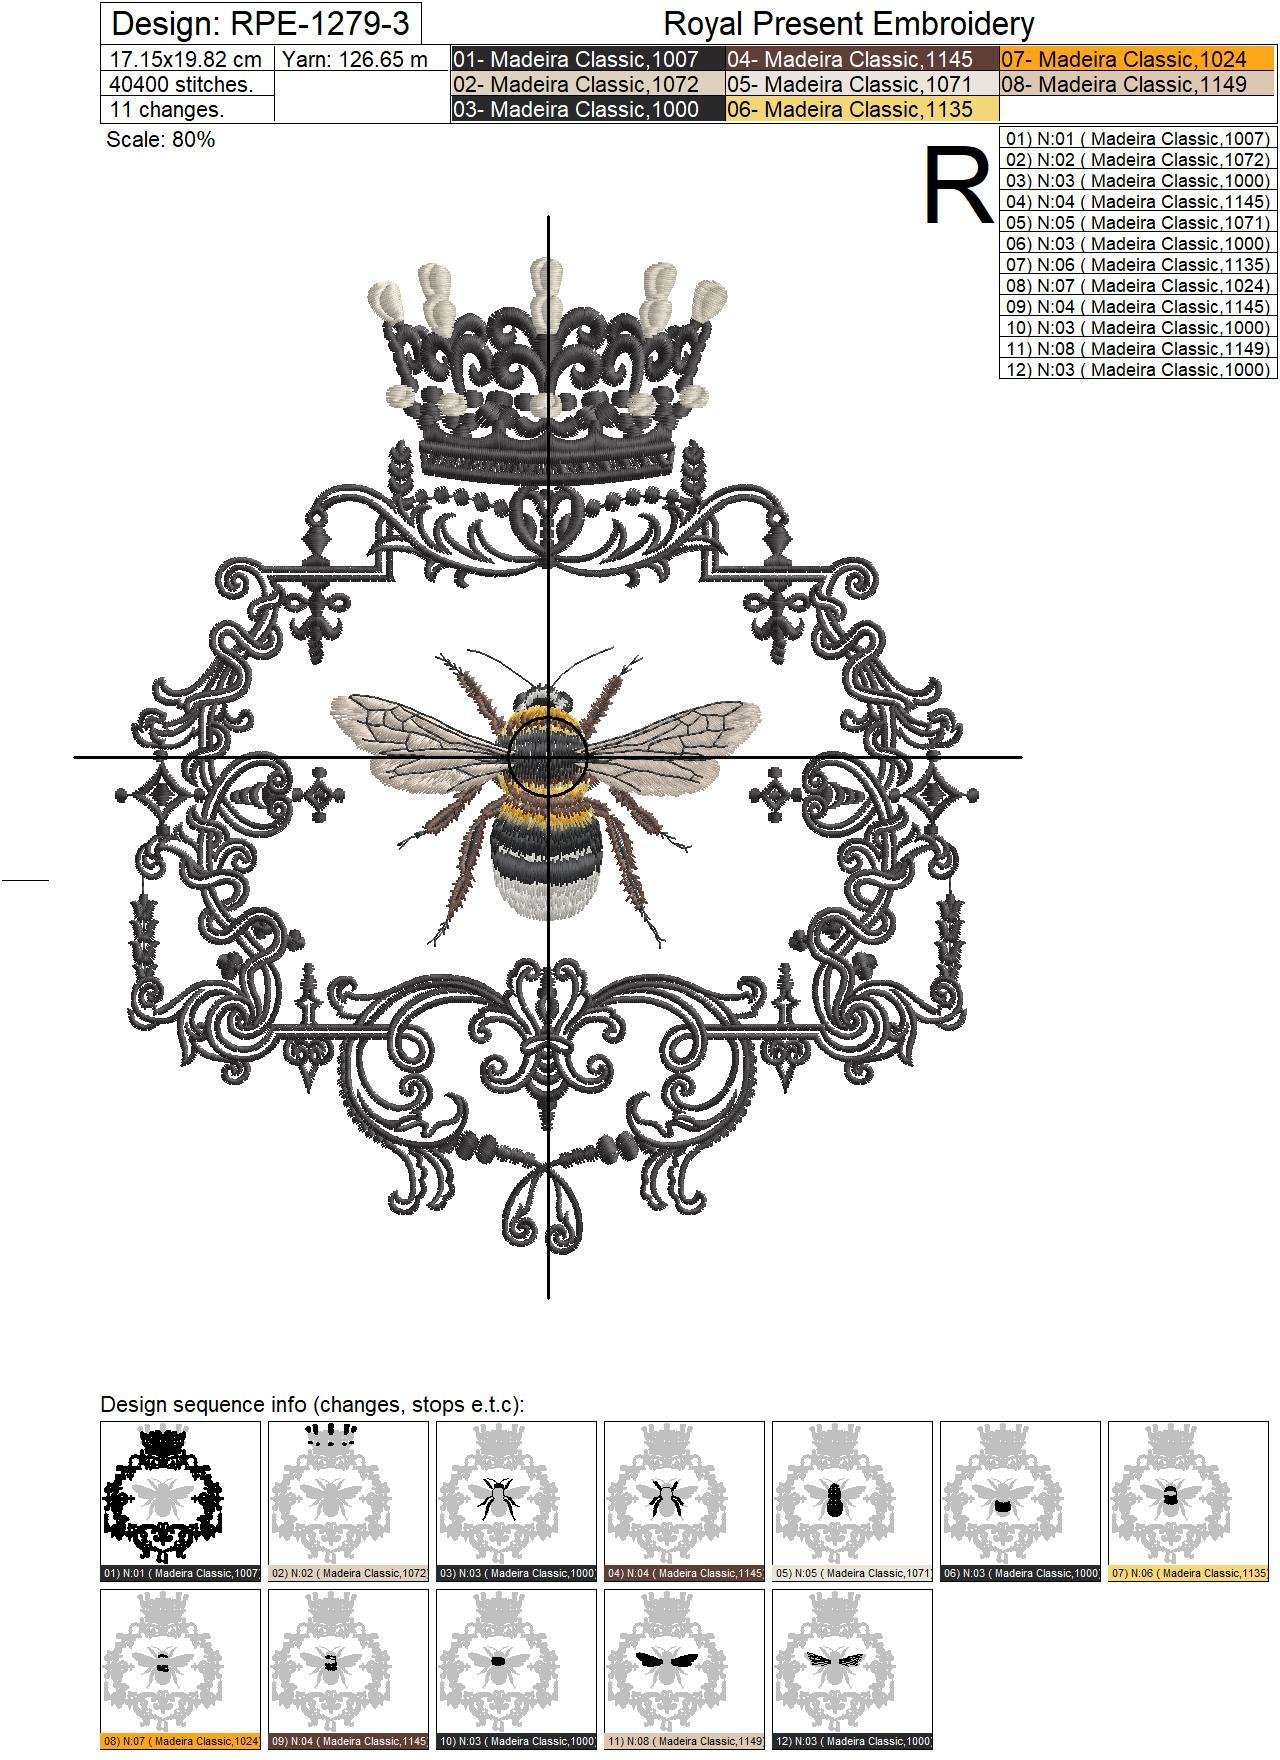
The central bee is surrounded by a symmetrical ornamental frame with scrolls, floral details and curved decorative lines. A crown positioned above the frame creates a strong royal focal point.
- detailed bee with clearly separated body and wings;
- ornate vintage-inspired frame;
- decorative crown above the composition;
- three professionally prepared sizes;
- vertical proportions for cushions, panels and bag fronts;
- suitable for classic, neutral and metallic-accent palettes.
Recommended Projects
- decorative cushion and pillow fronts;
- framed textile pictures and wall panels;
- structured tote bags and bag panels;
- jacket, vest, coat and robe backs;
- table runners and table toppers;
- upholstery-linen inserts;
- fabric storage-box panels;
- bee-themed gifts and beekeeper décor;
- French-inspired and vintage interiors.
Which Hoop Fits Each Size?
The smallest file measures 128.1x148.0 mm (5.04x5.83 "). It may fit a nominal 130x180 mm or 5x7 hoop only when the machine supports the complete 128.1 mm or 5.04 inch width.
A machine with an actual maximum width of only 5.00 inches or 127 mm cannot stitch this file. Check the usable embroidery field in the machine manual rather than relying only on the commercial hoop name.
The medium file measures 158.0x182.7 mm (6.22x7.19 "). A nominal 160x240 mm or 6.3x9.45 inch embroidery field may be suitable.
The largest file measures 171.5x198.2 mm (6.75x7.80 "). It may fit a nominal 180x300 mm or 7.09x11.81 inch field, or a 200x200 mm or 8x8 inch field.
How Do You Calculate Fabric Weight?
Use the weight stated by the fabric manufacturer whenever it is available. Fabric weight may be shown as GSM or g/m² in the metric system and as oz/yd² in the US system.
When the fabric weight is unknown, cut and weigh a measured sample.
Metric Fabric-Weight Formula
Fabric weight in g/m² = sample weight in grams × 10,000 ÷ sample area in cm²
For a rectangular sample:
Fabric g/m² = sample weight in grams × 10,000 ÷ (length in cm × width in cm)
- For a 10x10 cm sample, multiply the sample weight in grams by 100.
- For a 20x20 cm sample, multiply the sample weight in grams by 25.
- For a 25x25 cm sample, multiply the sample weight in grams by 16.
Metric Calculation Example
A 20x20 cm fabric sample weighs 7.2 grams.
7.2 × 10,000 ÷ (20 × 20) = 180 g/m²
The fabric therefore weighs 180 g/m².
US Fabric-Weight Formula
Fabric weight in oz/yd² = sample weight in ounces × 1,296 ÷ sample area in square inches
For a rectangular sample:
Fabric oz/yd² = sample weight in ounces × 1,296 ÷ (length in inches × width in inches)
The number 1,296 is used because one square yard contains 1,296 square inches:
36 inches × 36 inches = 1,296 square inches
- For a 12x12 inch sample, multiply the sample weight in ounces by 9.
- For an 18x18 inch sample, multiply the sample weight in ounces by 4.
- For a 9x9 inch sample, multiply the sample weight in ounces by 16.
US Calculation Example
A 12x12 inch fabric sample weighs approximately 0.59 ounces.
0.59 × 1,296 ÷ (12 × 12) = approximately 5.31 oz/yd²
A fabric weight of approximately 5.31 oz/yd² is equivalent to approximately 180 g/m².
What Is the Stabilizer-Weight Formula?
Use the following Royal Present practical starting formula:
Required stabilizer weight = fabric weight ÷ 3
Metric Formula
Required stabilizer g/m² = fabric g/m² ÷ 3
Example:
180 g/m² fabric ÷ 3 = 60 g/m² stabilizer
US Formula
Required stabilizer oz/yd² = fabric oz/yd² ÷ 3
Example:
5.31 oz/yd² fabric ÷ 3 = 1.77 oz/yd² stabilizer
Fabric and Stabilizer Weight Chart
| Fabric weight |
Fabric weight US |
Starting stabilizer weight |
Stabilizer weight US |
| 150 g/m² |
4.42 oz/yd² |
50 g/m² |
1.47 oz/yd² |
| 180 g/m² |
5.31 oz/yd² |
60 g/m² |
1.77 oz/yd² |
| 240 g/m² |
7.08 oz/yd² |
80 g/m² |
2.36 oz/yd² |
| 300 g/m² |
8.85 oz/yd² |
100 g/m² |
2.95 oz/yd² |
| 360 g/m² |
10.62 oz/yd² |
120 g/m² |
3.54 oz/yd² |
How Do You Convert GSM to Ounces per Square Yard?
Use these conversion formulas:
oz/yd² = g/m² ÷ 33.9057
g/m² = oz/yd² × 33.9057
For example, 300 g/m² fabric is approximately 8.85 oz/yd². Its starting stabilizer requirement is 100 g/m², which is approximately 2.95 oz/yd².
Does the Formula Apply to One Layer or Several Layers?
The formula refers to the combined structural weight of the backing under the fabric. The target may be reached with one stabilizer layer or several layers.
For example, a 300 g/m² or 8.85 oz/yd² upholstery linen gives the following result:
300 g/m² ÷ 3 = 100 g/m²
8.85 oz/yd² ÷ 3 = 2.95 oz/yd²
Possible starting combinations include:
- one 100 g/m² or approximately 2.95 oz/yd² backing;
- two 50 g/m² or approximately 1.47 oz/yd² layers;
- one 60 g/m² plus one 40 g/m² layer;
- another combination with a total close to 100 g/m².
When using two directional stabilizer layers, place them so their strongest directions support different fabric axes when the stabilizer construction permits it.
Does Water-Soluble Topping Count in the Formula?
No. Water-soluble topping placed above the fabric is not counted as the structural backing calculated by the fabric-weight formula.
The topping controls surface texture and prevents fine stitches from sinking into linen fibers, fleece or pile. The calculated tear-away or cutaway backing remains underneath the fabric.
The embroidery sandwich for textured linen is:
- calculated tear-away or cutaway stabilizer under the fabric;
- linen or upholstery fabric in the middle;
- water-soluble topping above the textured surface.
Which Stabilizer Type Should You Choose?
The formula calculates the starting weight. Fabric behavior determines the appropriate type.
| Fabric or project |
Starting stabilizer type |
| Stable, tightly woven linen |
Medium or heavyweight tear-away |
| Loose linen or fabric that shifts |
Cutaway stabilizer |
| Frequently handled cushion or bag |
Cutaway for permanent support |
| Stretch knit or sweatshirt fabric |
Cutaway or no-show mesh |
| Heavy canvas used as a rigid panel |
Strong tear-away or cutaway after testing |
| Textured linen, fleece or velvet |
Calculated backing underneath plus water-soluble topping above |
Stabilizer Recipe for Heavy Upholstery Linen
First determine the actual weight of the linen from the manufacturer’s label or by weighing a measured sample.
For upholstery linen weighing 300 g/m² or approximately 8.85 oz/yd²:
- target backing weight: approximately 100 g/m² or 2.95 oz/yd²;
- backing type: strong tear-away for stable linen or cutaway for a loose weave;
- surface layer: water-soluble topping above the linen;
- fixation: basting frame or temporary adhesive when required;
- needle: begin testing with 75/11 for smoother linen or 90/14 for coarse upholstery fabric.
The water-soluble topping and temporary adhesive are separate from the calculated backing weight.
Stabilizer Recipe for Medium-Weight Linen
For linen weighing 180 g/m² or approximately 5.31 oz/yd², begin with approximately 60 g/m² or 1.77 oz/yd² of structural backing.
Use tear-away when the linen is tightly woven and the finished project remains stable. Use cutaway when the weave opens, the design shifts during stitching or the finished item will be handled and washed repeatedly.
Stabilizer Recipe for Canvas or a Tote Bag
Calculate the canvas weight and divide it by three. For example, 360 g/m² or 10.62 oz/yd² canvas gives a target backing weight of approximately 120 g/m² or 3.54 oz/yd².
For a tote bag that will bend and carry weight, cutaway support is usually more practical than tear-away. Embroider the flat front panel before attaching handles, lining, zipper or side seams.
Can You Use the Design on Sweatshirt Fabric?
Yes, but use permanent cutaway support. Calculate the fabric weight first, divide it by three and select the nearest suitable combined cutaway weight.
Add water-soluble topping when the sweatshirt surface is brushed. Avoid placing the design across a pouch pocket, zipper, ribbing or bulky seam.
Is the Design Suitable for Lightweight T-Shirts?
Lightweight jersey is not the preferred material for this ornate design. The frame, crown and central bee can create a relatively firm embroidered area even when the calculated stabilizer weight is correct.
A stable sweatshirt, jacket back, woven insert, cushion panel or tote bag is generally a better project.
How Do You Hoop Heavy Linen?
When the linen can be hooped, hoop the calculated stabilizer and fabric together without stretching the material. Place the water-soluble topping above the fabric and secure it with a basting frame.
When the upholstery linen is too thick or stiff for direct hooping:
- hoop the calculated backing only;
- apply a small amount of temporary embroidery adhesive to the backing away from the machine;
- position the linen on the hooped stabilizer;
- secure the fabric with a basting frame;
- place water-soluble topping above the linen;
- support the fabric so its weight does not pull on the carriage.
For more detail, read Temporary Adhesive Spray for Machine Embroidery.
Which Needle Should You Use?
For smooth medium-weight linen or cotton, begin with a fresh 75/11 embroidery needle.
For coarse or heavy upholstery linen, test an 80/12 or 90/14 needle. Use the smallest needle that passes cleanly through the complete fabric-and-stabilizer sandwich without bending, skipped stitches or repeated thread breaks.
Thread and Color Recommendations
- Classic royal: black frame, gold crown and natural bee colors.
- Antique: bronze, dark brown, muted gold and cream.
- Monochrome: black, navy, ivory or charcoal.
- Modern neutral: taupe, gray, cream and muted mustard.
- Luxury: black embroidery with controlled metallic-gold accents.
Maintain sufficient contrast between the bee, crown, frame and background. Dark ornamental stitching may disappear on black, brown or navy fabric.
Can Metallic Thread Be Used?
Metallic thread can be added selectively to the crown, bee or ornamental highlights. It is safer as an accent than as a replacement for every outline and filled section.
- use a needle intended for metallic embroidery thread;
- reduce the embroidery speed;
- allow the spool to unwind freely;
- check the thread path for friction;
- test the complete metallic color block first.
How Do You Prevent Puckering?
- calculate the fabric weight rather than guessing the backing weight;
- use total backing weight close to fabric weight divided by three;
- do not stretch the fabric during hooping;
- cover the complete hoop opening with stabilizer;
- add permanent cutaway support for unstable or flexible projects;
- add topping when surface texture hides fine stitches;
- support heavy fabric near the machine;
- check upper-thread and bobbin tension;
- complete a test stitch on matching materials.
How Do You Prevent Outline Shifting?
Outline displacement usually means that the fabric moved relative to the backing or the stabilizer was too light for the fabric and design.
Recalculate the backing weight, use a more permanent stabilizer type when necessary, add a basting frame and ensure the entire design area is securely attached to the backing.
How Should the Design Be Placed on a Cushion?
Mark the finished cushion size and seam allowances before hooping. Keep the crown, lower ornament and outer frame completely inside the visible front panel.
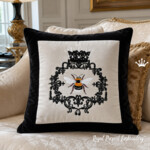
Embroider the flat cushion front before attaching the zipper, piping, backing or lining. A contrasting fabric insert can reinforce the framed appearance.
How Should the Design Be Placed on a Tote Bag?
Embroider the flat outer panel before assembling the bag. Mark the handles, zipper, pockets, side seams, boxed corners and upper fold.
Use permanent cutaway backing calculated from the actual canvas or outer-fabric weight. Place the crown low enough that it remains visible after the bag is filled.
More About Fabric, Stitching and Stabilizer Balance
Read Machine Embroidery: Fabric, Stitch Density and Stabilizer Balance for additional information about how fabric structure and embroidery load affect the finished result.
Explore Related Designs
Browse additional frames, classic ornaments and traditional decorative motifs in Classic Machine Embroidery Designs.
Do Not Resize the Files Independently
Do not enlarge or reduce the supplied embroidery files independently. Without professional stitch recalculation, resizing can damage density, underlay, pull compensation, the bee’s details, the crown, fine ornamental lines and alignment between filled areas and outlines.
Royal Present is not responsible for embroidery quality after the customer independently resizes, edits or converts the supplied files.
About the Designer
This Royal Present Embroidery design was created by Ludmila Konovalova, machine embroidery designer.
FAQ
What is the formula for selecting stabilizer weight?
Divide the fabric weight by three. A 180 g/m² fabric requires a starting stabilizer weight of approximately 60 g/m². A 5.31 oz/yd² fabric requires approximately 1.77 oz/yd².
How do I calculate fabric GSM from a sample?
Multiply the sample weight in grams by 10,000 and divide the result by the sample area in square centimeters. For a rectangular sample, divide by its length in centimeters multiplied by its width in centimeters.
How do I calculate fabric weight in ounces per square yard?
Multiply the sample weight in ounces by 1,296 and divide by the sample area in square inches. For a 12x12 inch sample, multiply the sample weight in ounces by nine.
How do I convert GSM to ounces per square yard?
Divide the GSM value by 33.9057. To convert ounces per square yard to GSM, multiply by 33.9057.
Does water-soluble topping count toward the stabilizer weight?
No. The weight formula applies to structural backing under the fabric. Water-soluble topping is placed above textured fabric and is added separately.
Can I combine two stabilizer layers?
Yes. Their combined weight should be close to the calculated target. For example, two 50 g/m² layers provide approximately 100 g/m² of total backing.
Which stabilizer should I use on 300 g/m² upholstery linen?
Divide 300 g/m² by three. Begin with approximately 100 g/m² or 2.95 oz/yd² of structural backing. Add water-soluble topping above a textured surface.
Should I use tear-away or cutaway on linen?
Use tear-away on stable, tightly woven linen. Choose cutaway when the weave is loose, the project bends during use, the item will be washed repeatedly or the test shows movement after tear-away removal.
Which size may fit a 5x7 hoop?
The smallest file measures 128.1x148.0 mm (5.04x5.83 "). It requires a machine that supports at least 5.04 inches of usable width, so a true 5.00-inch field is not sufficient.
Which hoop is required for the largest size?
The largest file measures 171.5x198.2 mm (6.75x7.80 "). It may fit a 180x300 mm, 7.09x11.81 inch, 200x200 mm or 8x8 inch embroidery field.
Can metallic thread be used?
Yes, as an accent in the crown, frame or bee. Use a metallic needle, reduce machine speed and test the complete color block before embroidering the final project.
Can I resize the design myself?
No. Independent resizing can damage density, underlay, pull compensation and outline registration. When another size is required, use the professional Resize of Design service.
Is a test stitch still necessary after using the formula?
Yes. The formula provides a starting backing weight. A complete test confirms whether the stabilizer type, number of layers, needle, topping, thread tension and hooping method are correct for the actual fabric.

 Get Sign-In Link
 Login with Google
 Login with Facebook
 Login with Amazon
 Login with Paypal