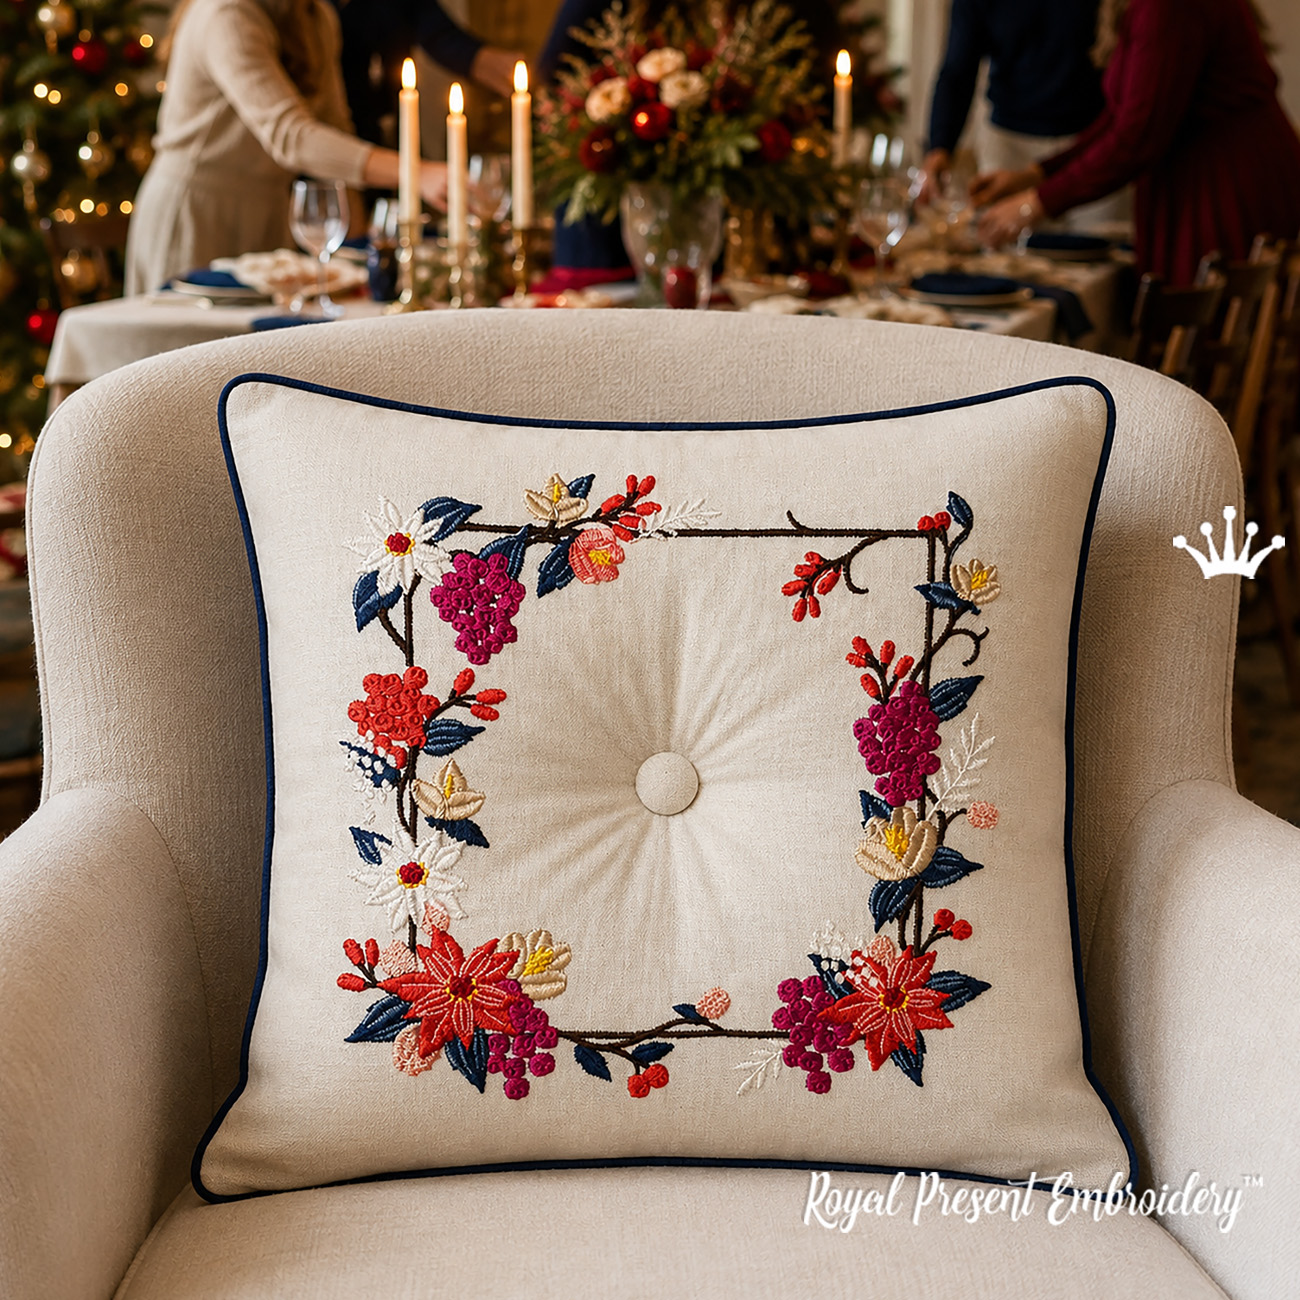
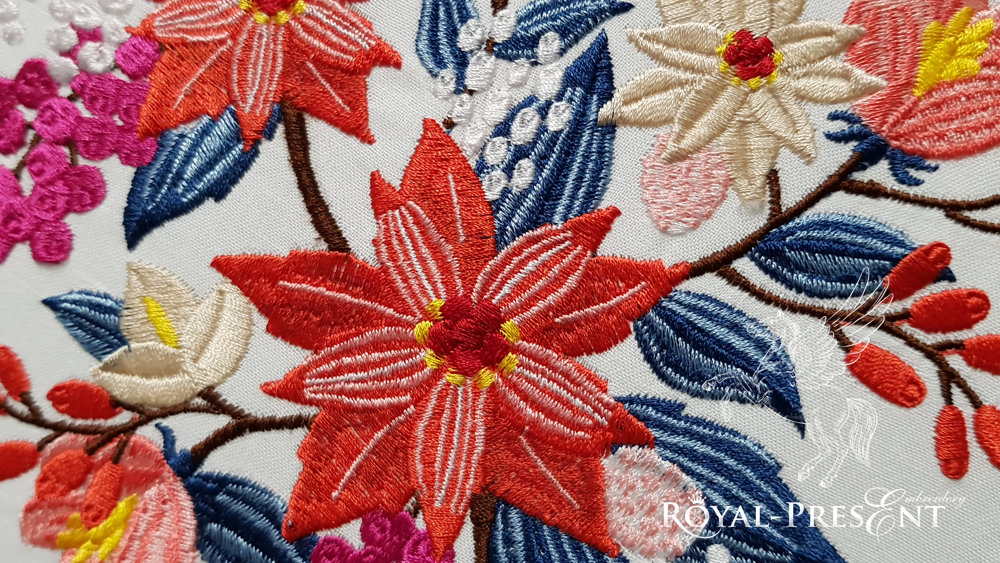
The Christmas Square Border with Poinsettias Machine Embroidery Design creates an elegant floral frame for Christmas and winter textile projects. The open center can be left plain, gathered with a button or personalized with a seasonal inscription.
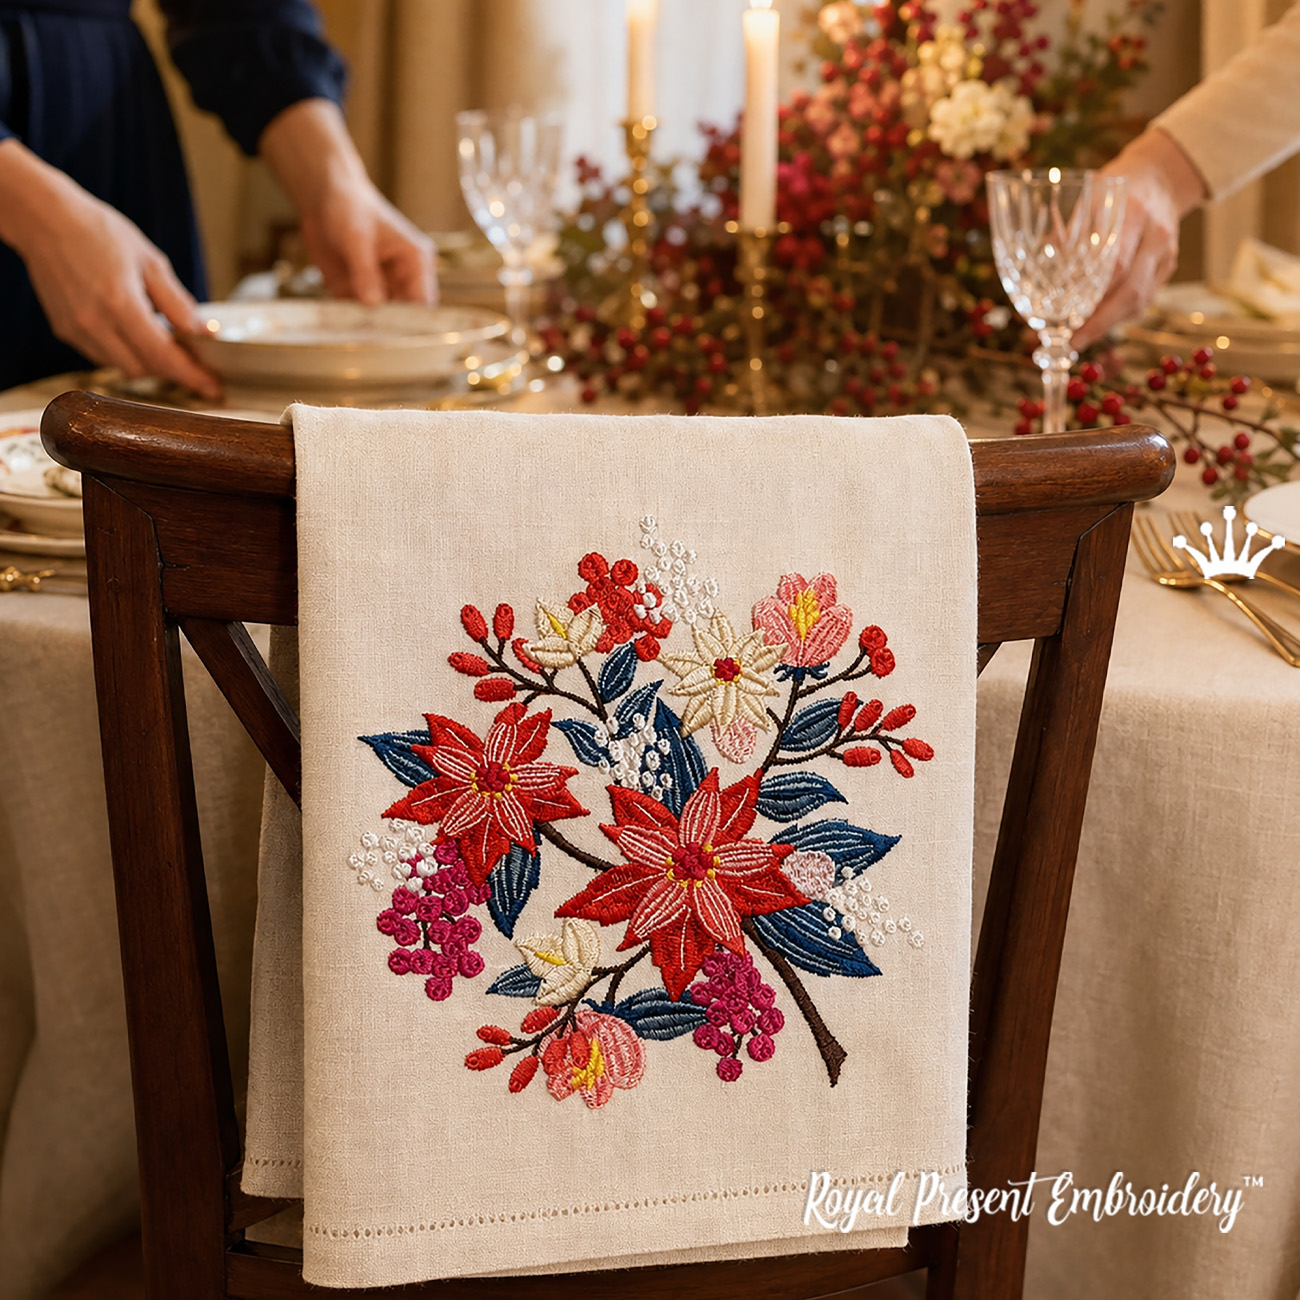
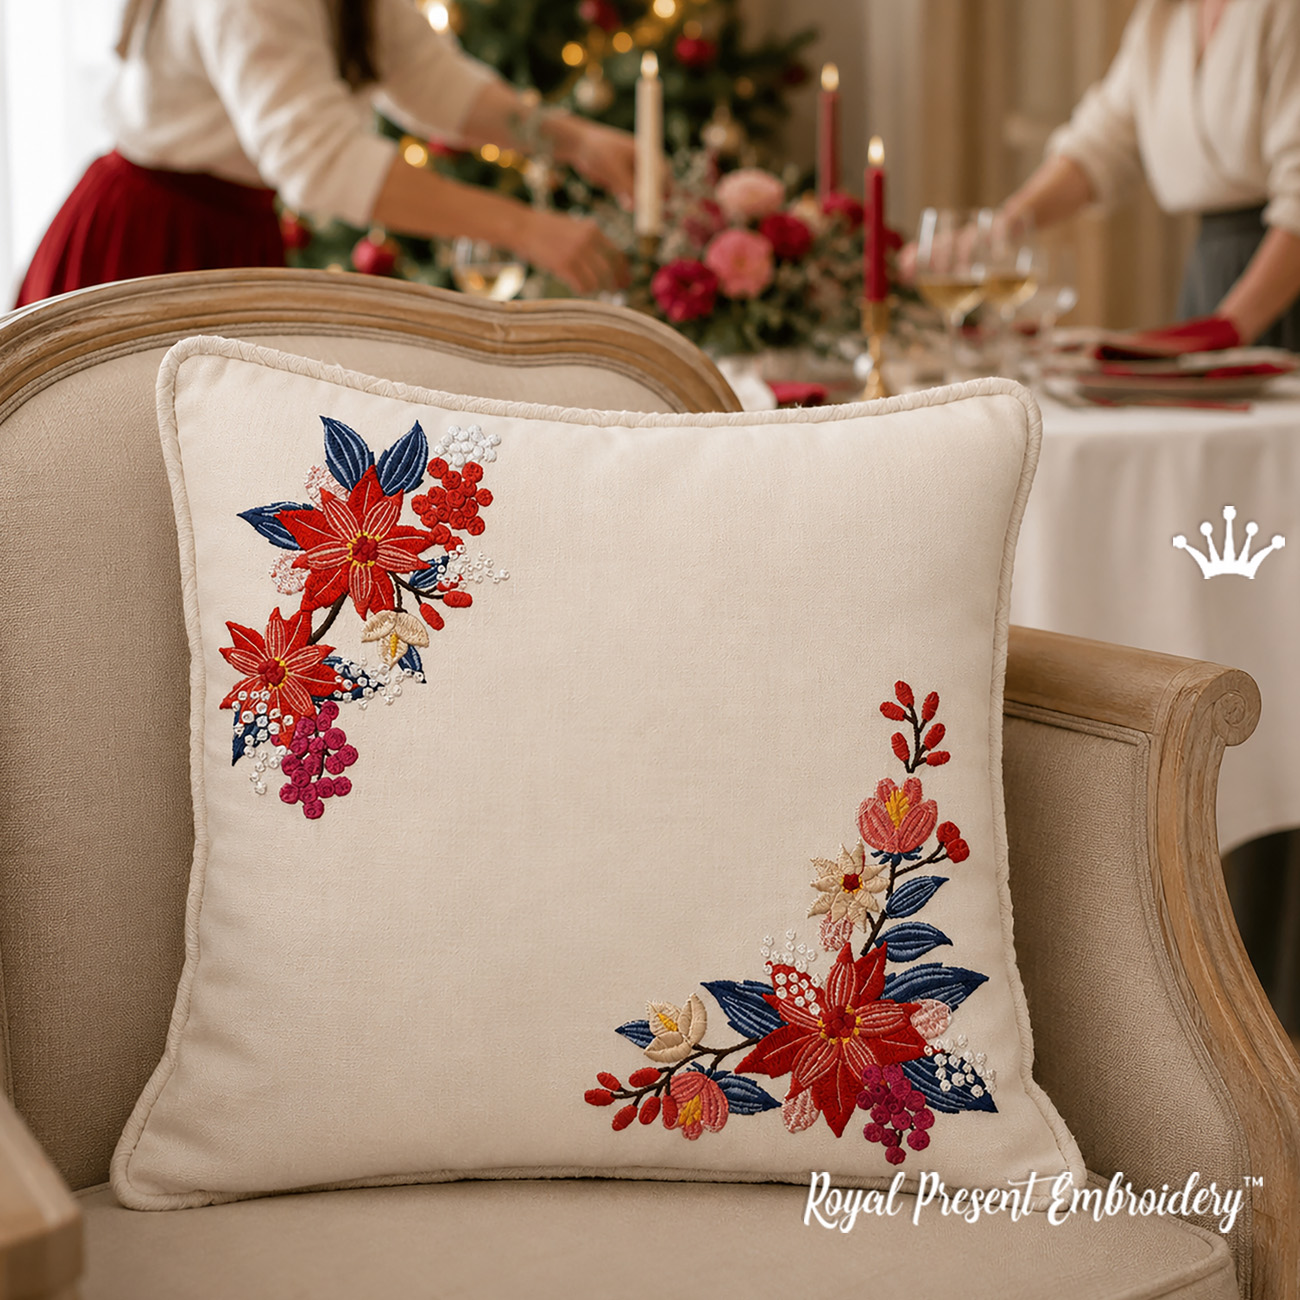
This poinsettia machine embroidery design works especially well on decorative linen pillows, Christmas towels, holiday aprons, table toppers, placemats, napkins and other festive table linens.
Design sizes and embroidery formats
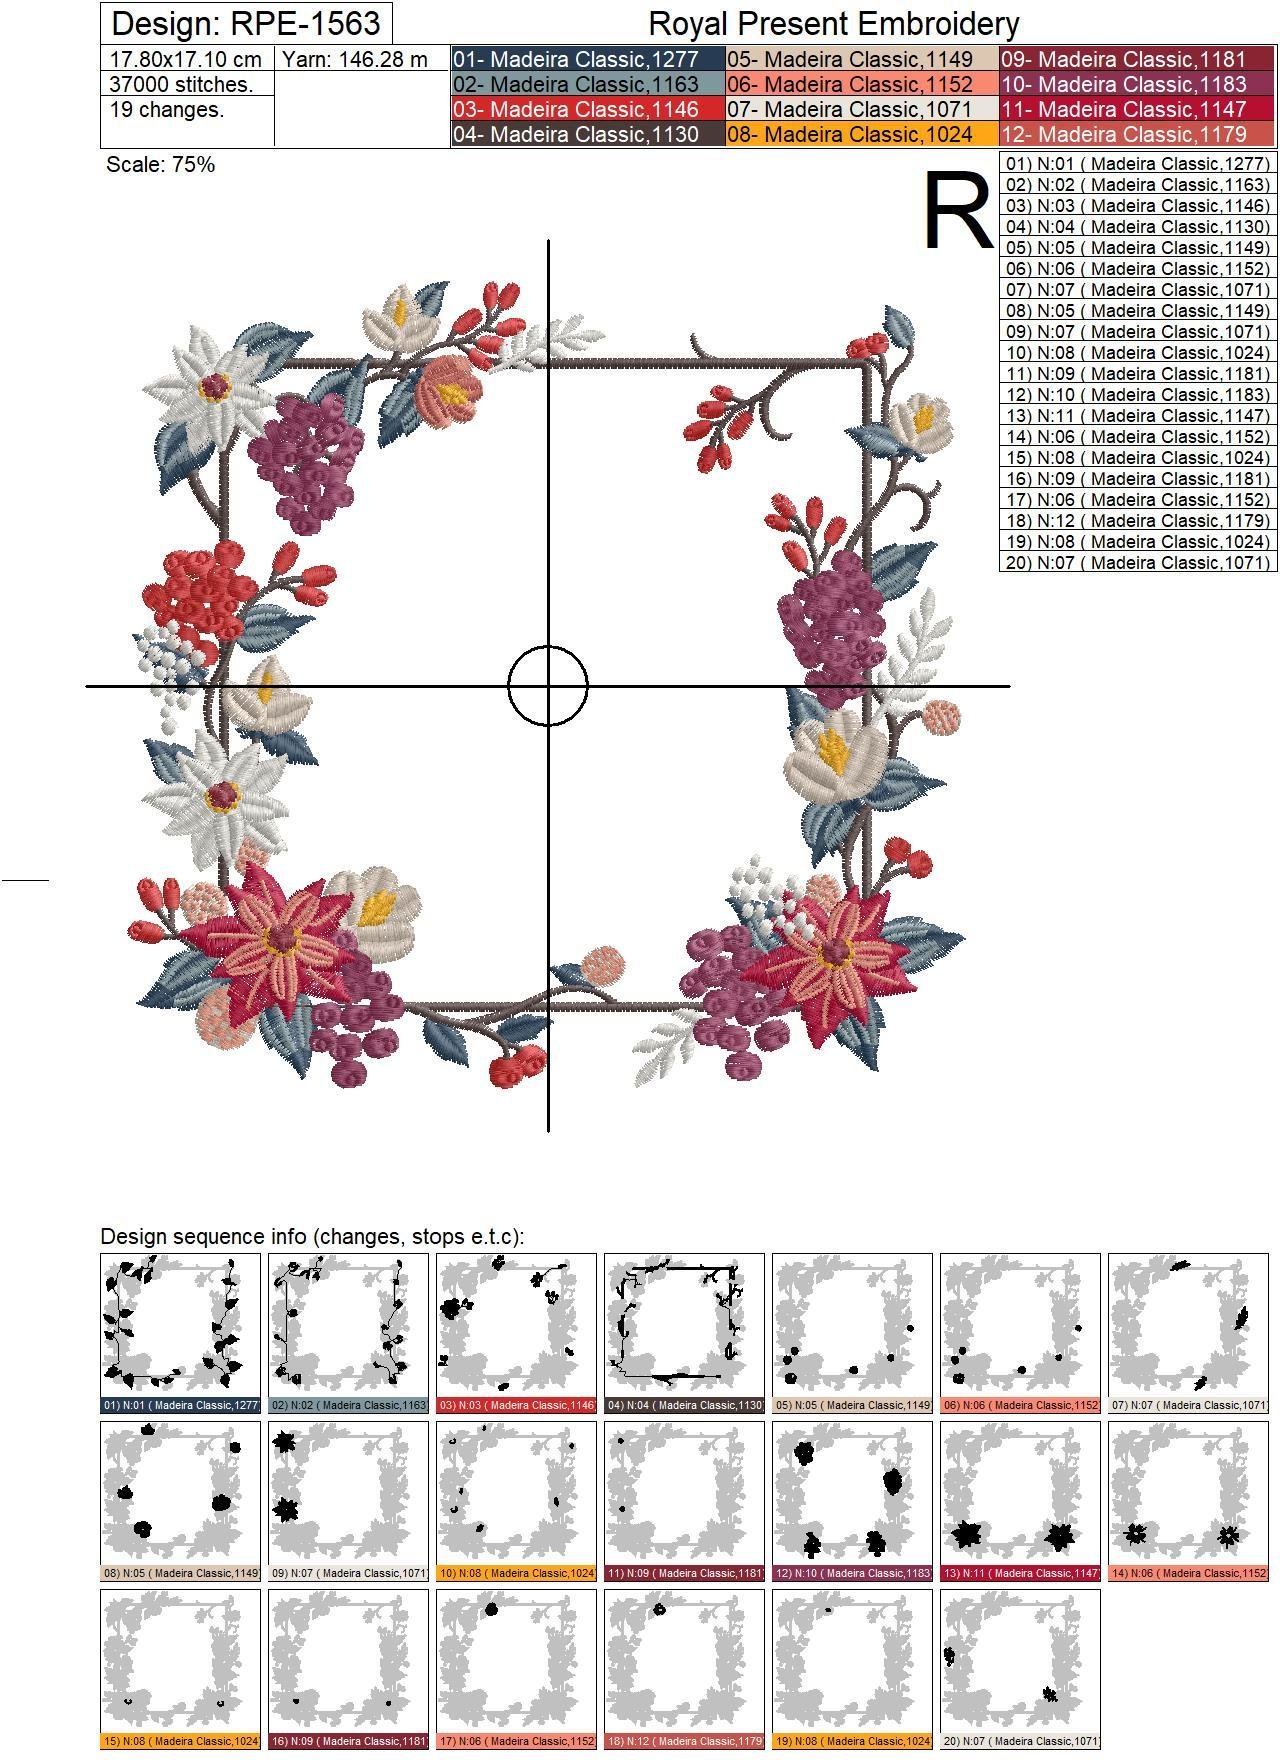
Size: 178.0x171.0 mm (7.01x6.73 "), Stitches: 37043
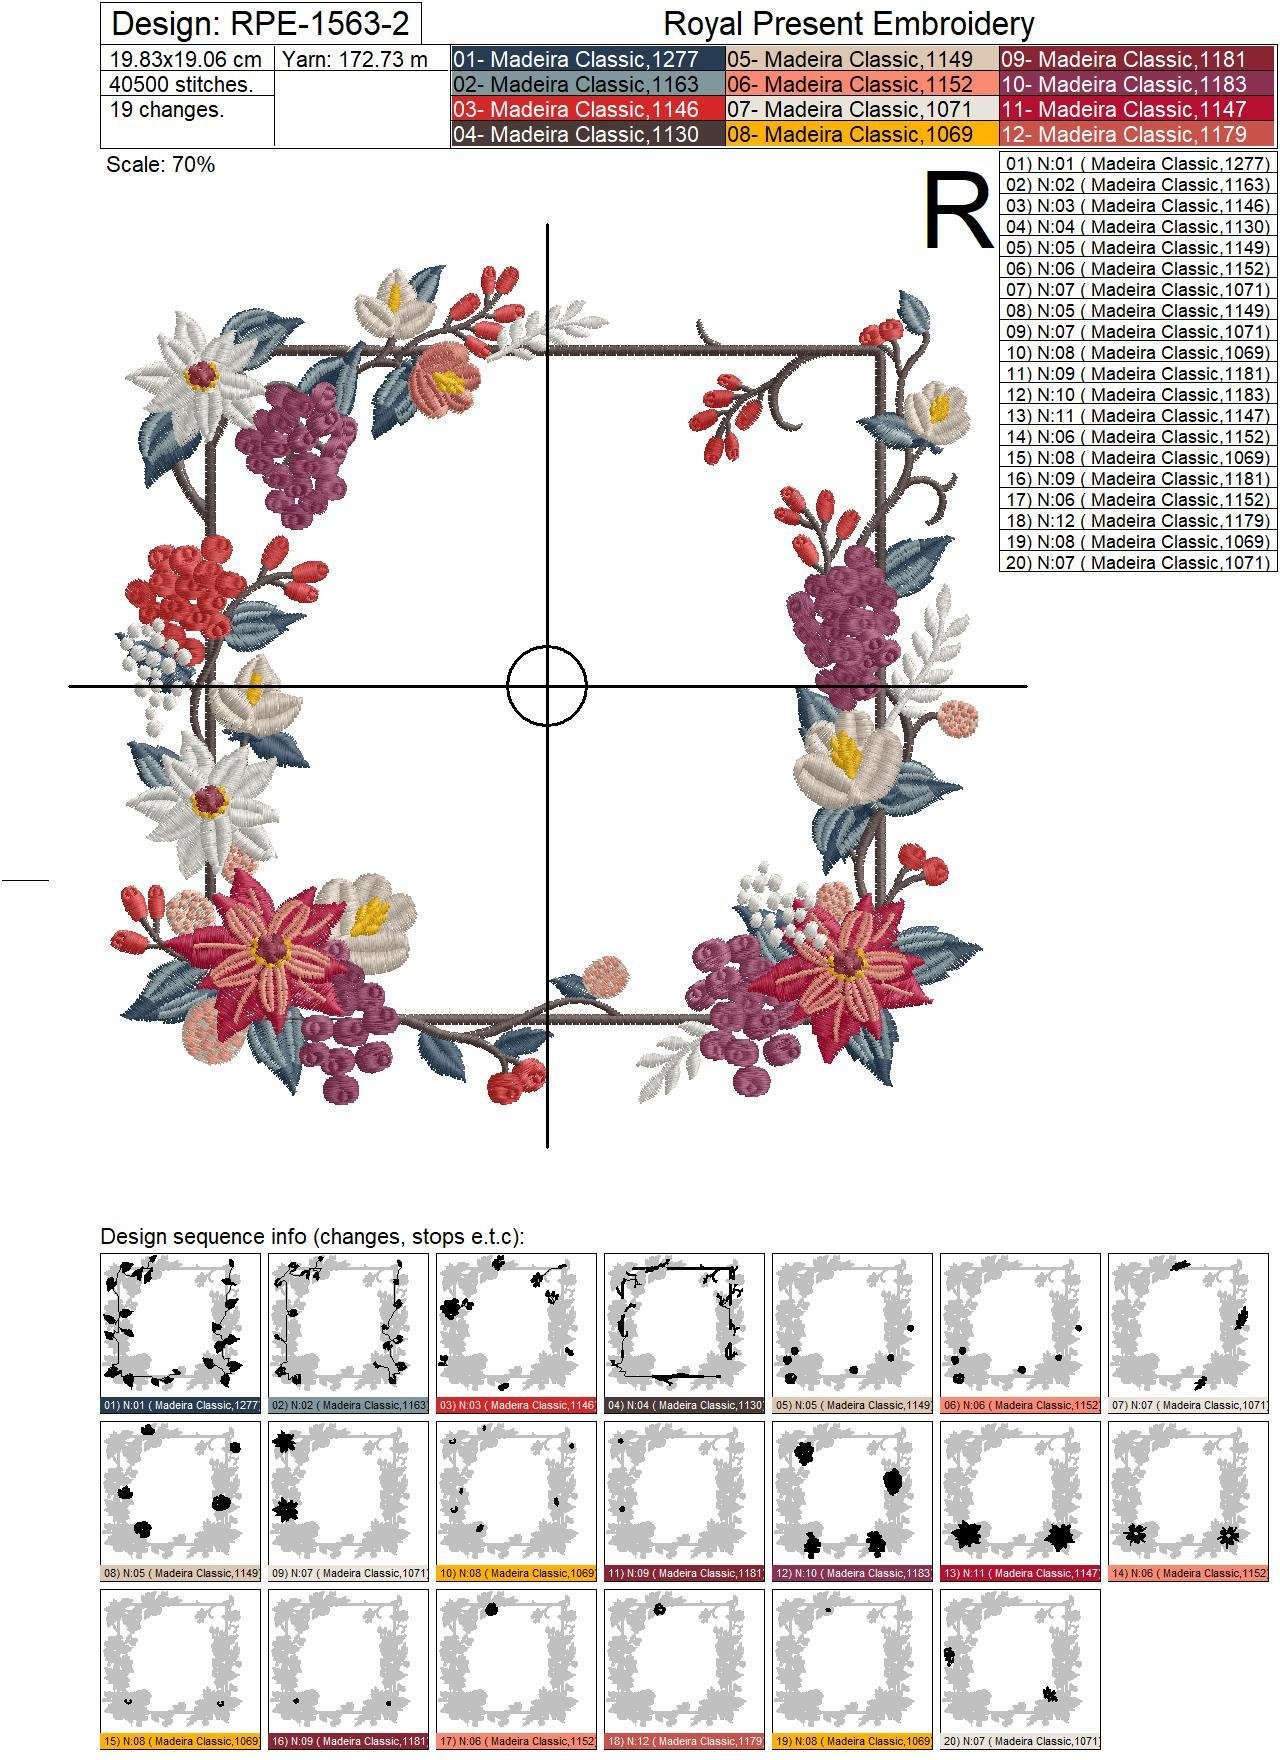
Size: 198.3x190.6 mm (7.81x7.50 "), Stitches: 40557
Formats: .pes, .pec, .hus, .vip, .dst, .exp, .sew, .exp, .dat, .vp3, .jef, xxx
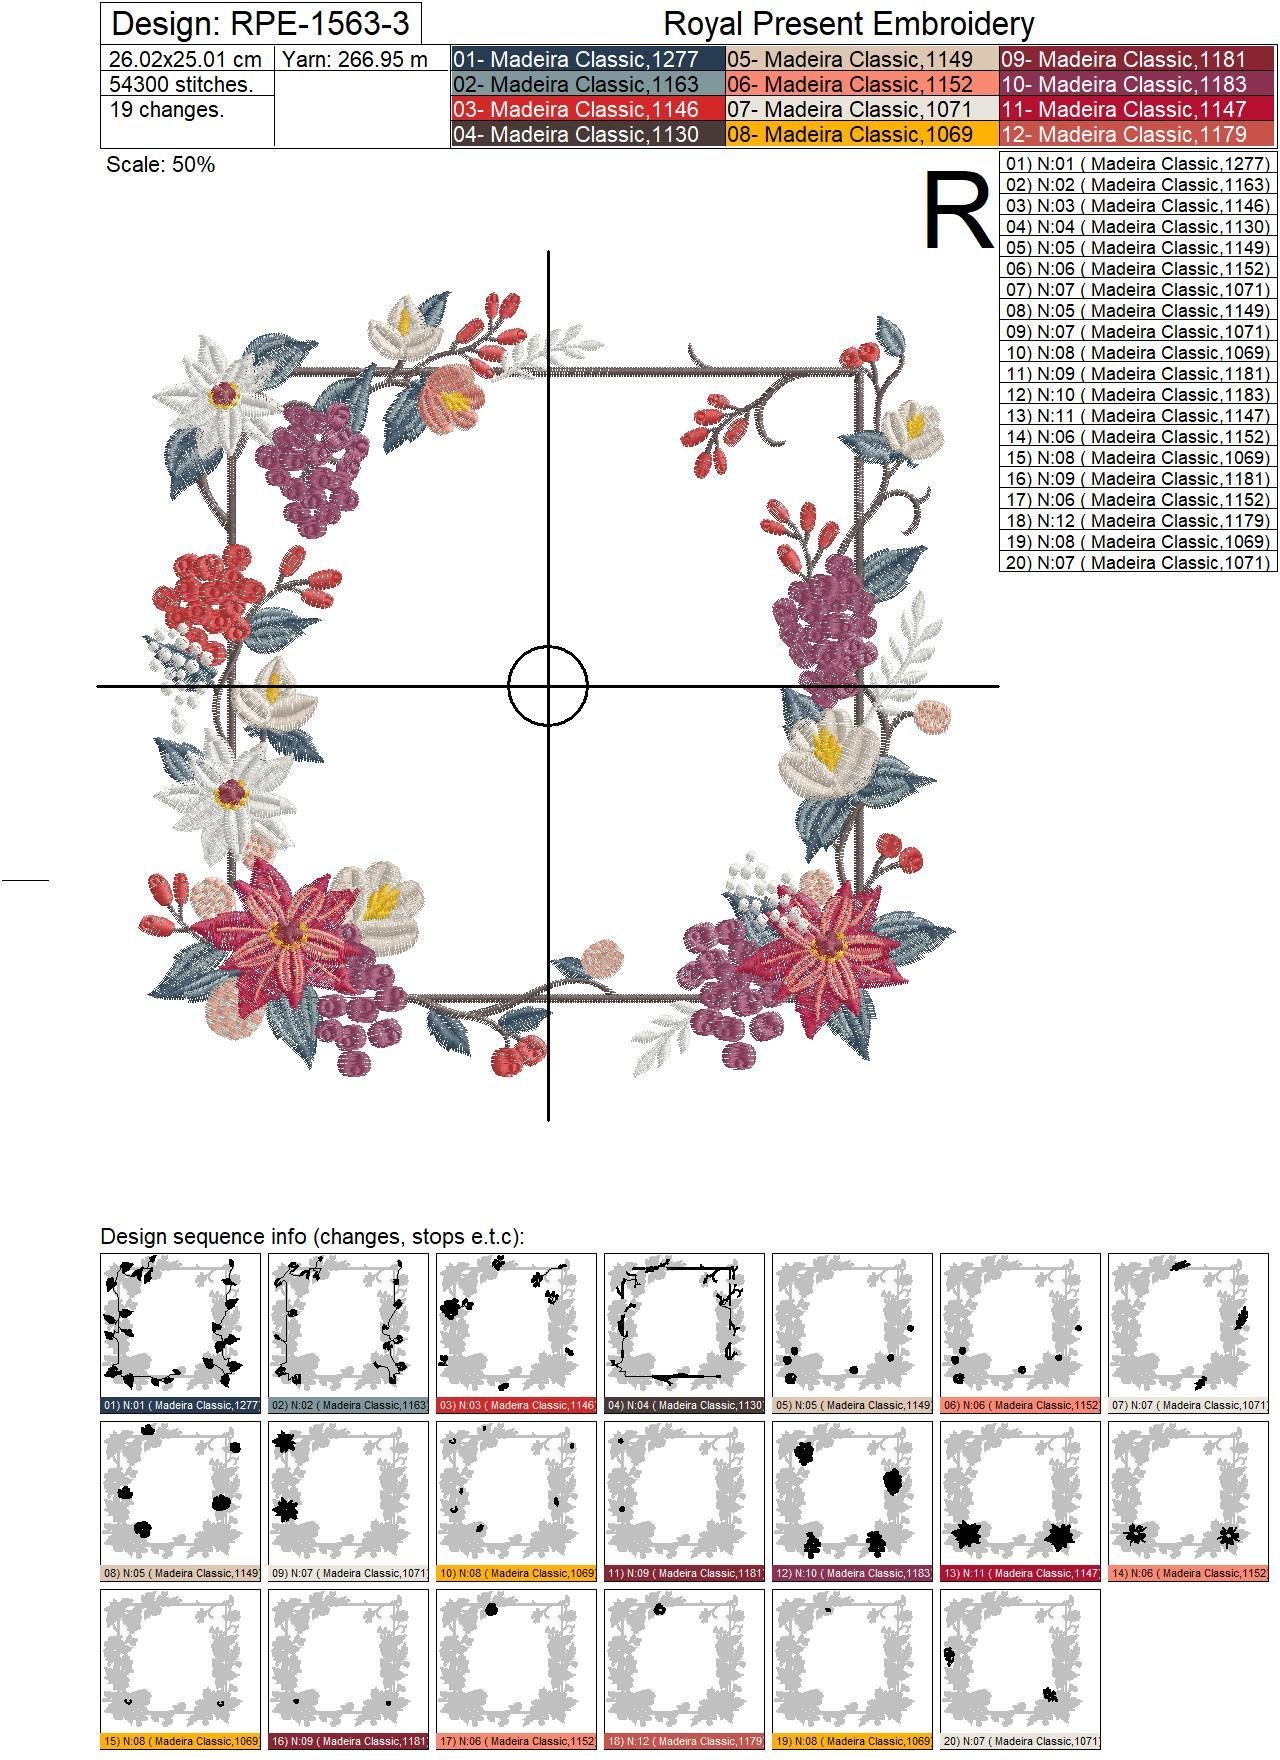
Size: 260.2x250.1 mm (10.24x9.85 "), Stitches: 54386
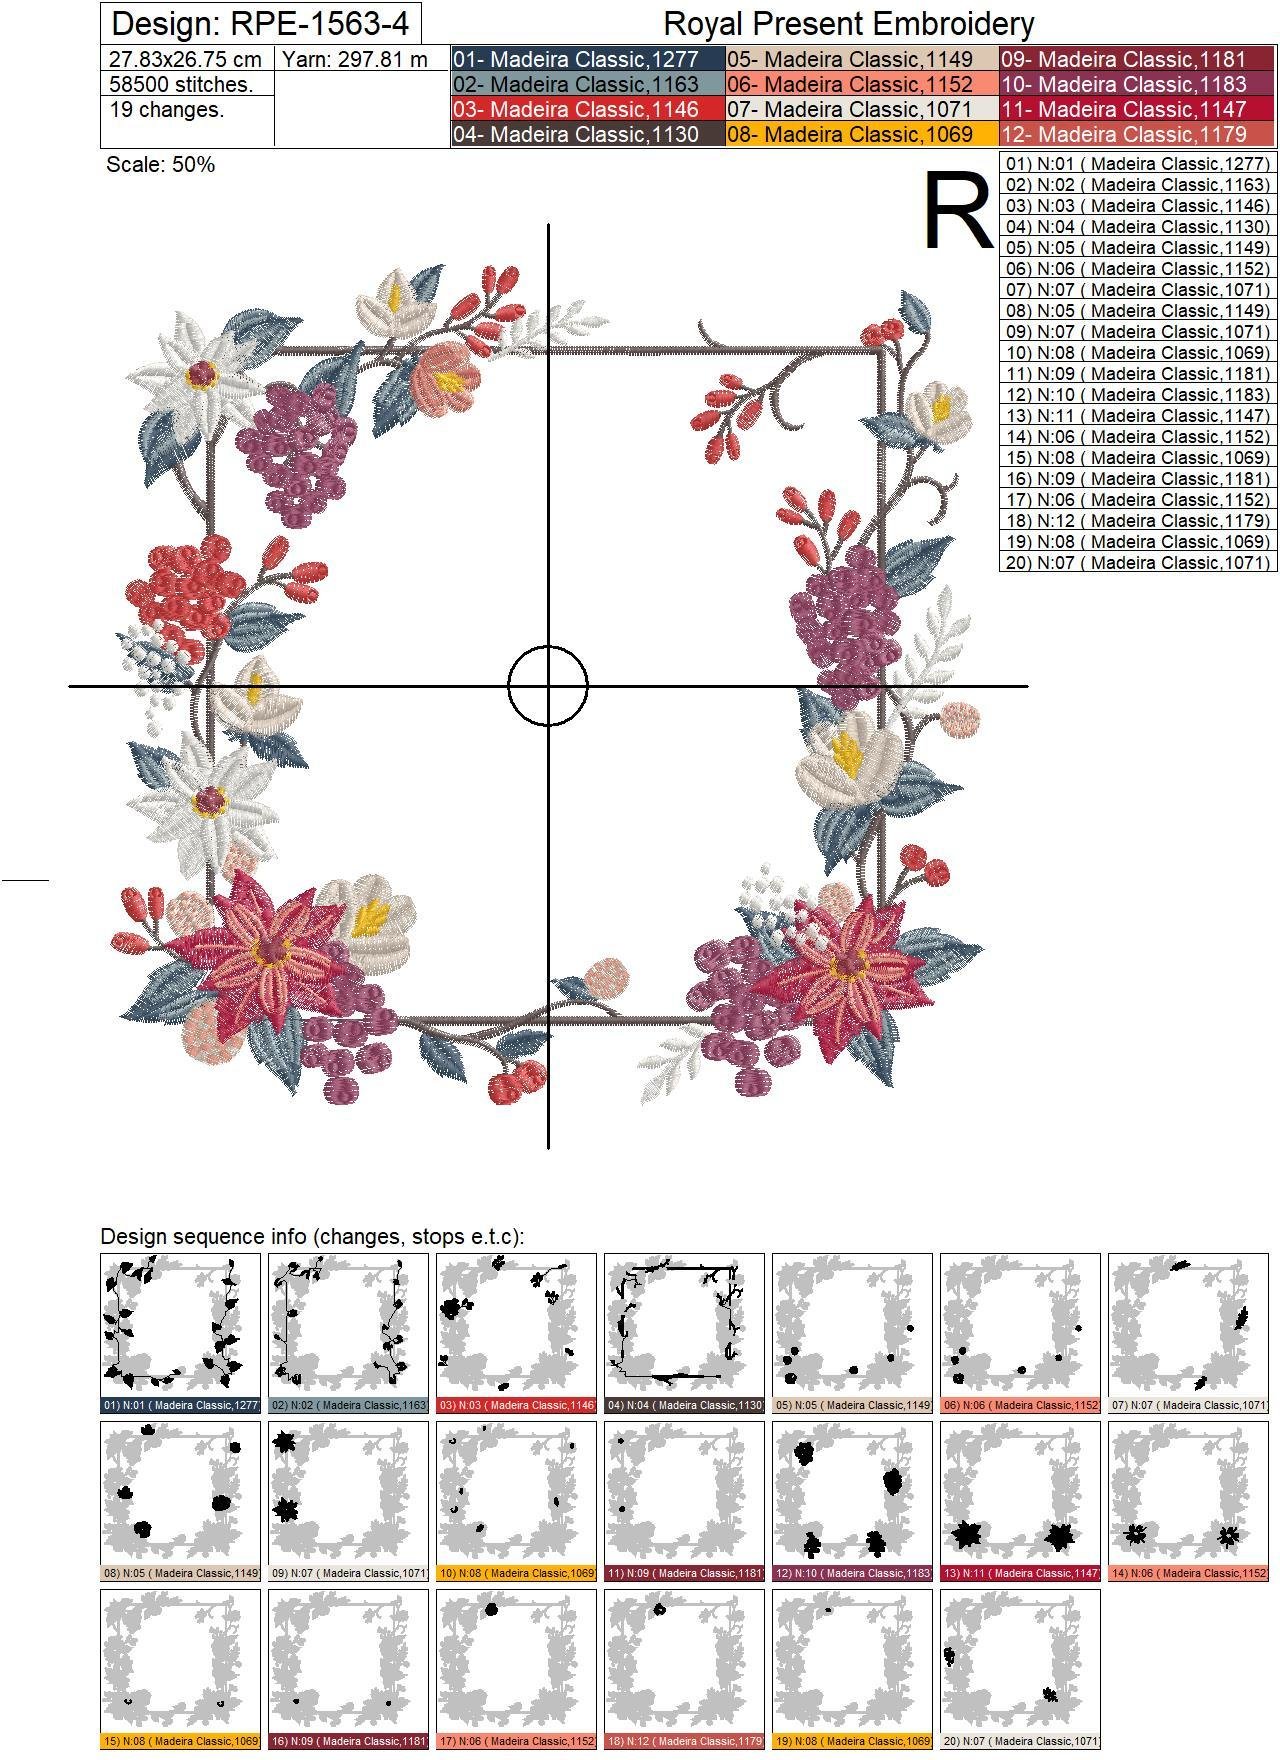
Size: 278.3x267.5 mm (10.96x10.53 "), Stitches: 59396
Size: 310.2x298.1 mm (12.21x11.74 "), Stitches: 67751
Format: .dst
The first two sizes are supplied in multiple home-machine embroidery formats. The three largest sizes are supplied in DST only and require a machine with a sufficiently large embroidery field, large hoop or mega hoop. DST is an embroidery-machine stitch file
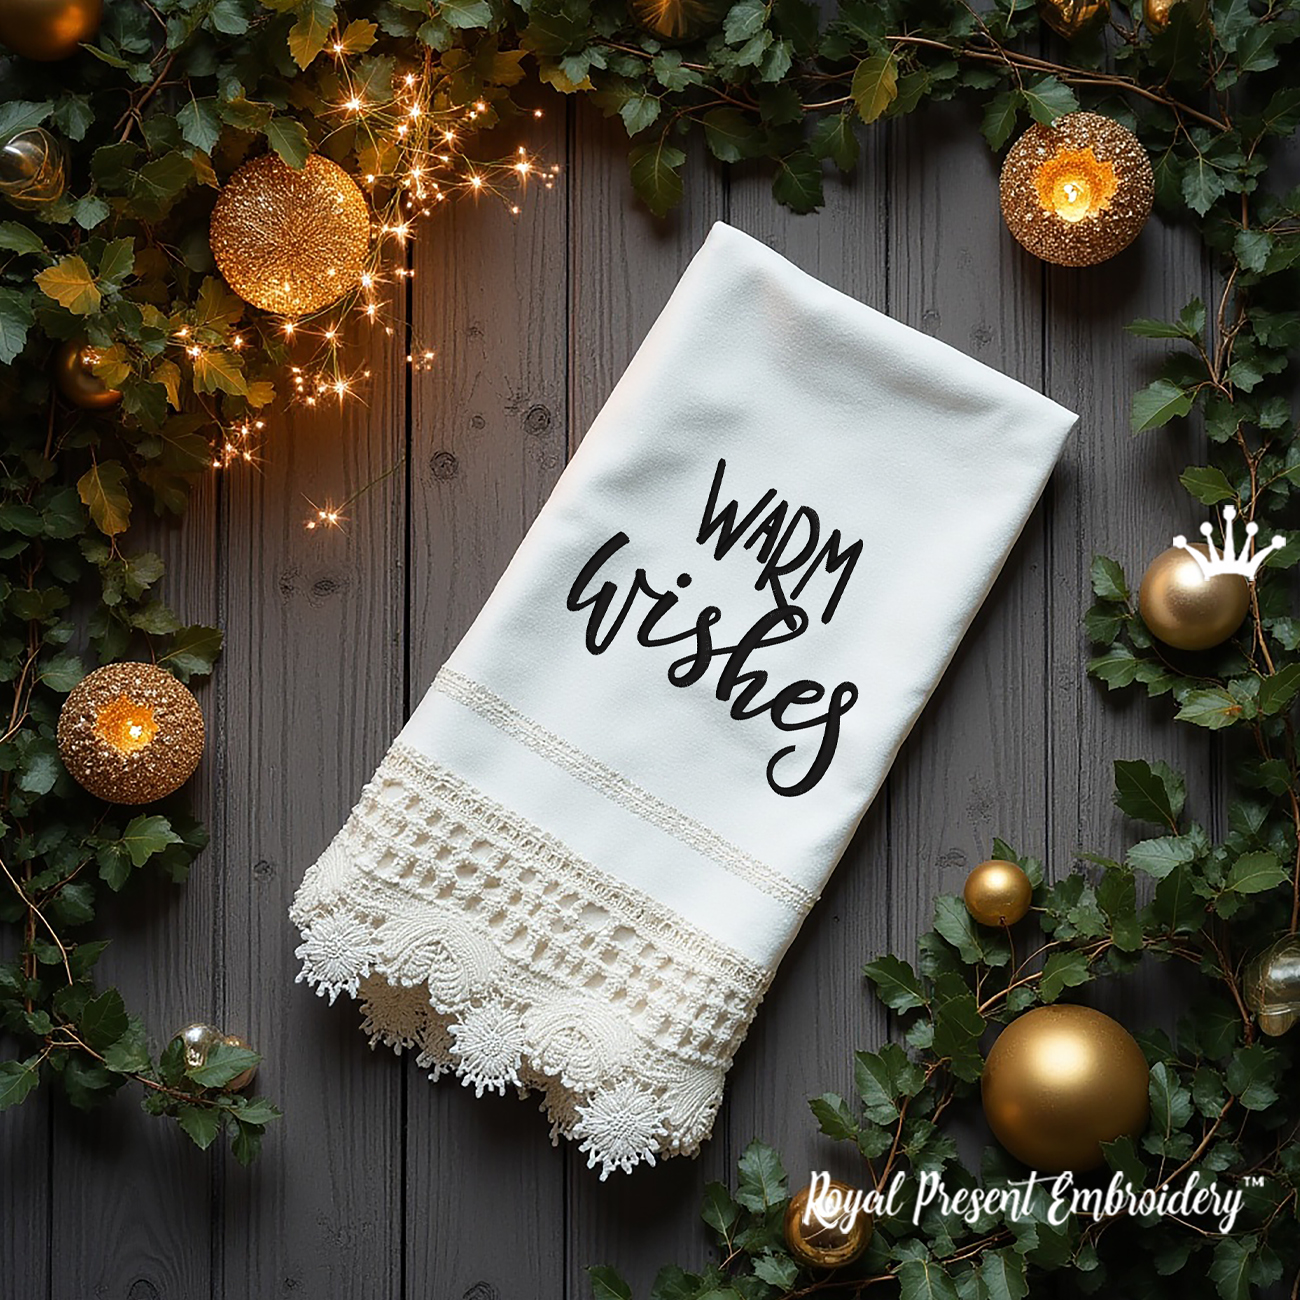
Warm Wishes inscription sizes NOT INCLUDED
Size: 98.8x83.0 mm (3.89x3.27 "), Stitches: 5866
Size: 108.6x91.3 mm (4.28x3.59 "), Stitches: 6456
Size: 119.4x100.4 mm (4.70x3.95 "), Stitches: 7108
Formats: .dst, .jef, .pec, .vip, .hus, .pes, .exp, .sew, .dat, xxx, vp3
Choose the inscription size after previewing the complete frame-and-lettering composition in your embroidery software. Do not resize the inscription automatically if one of the supplied sizes already fits.
Christmas embroidery project ideas
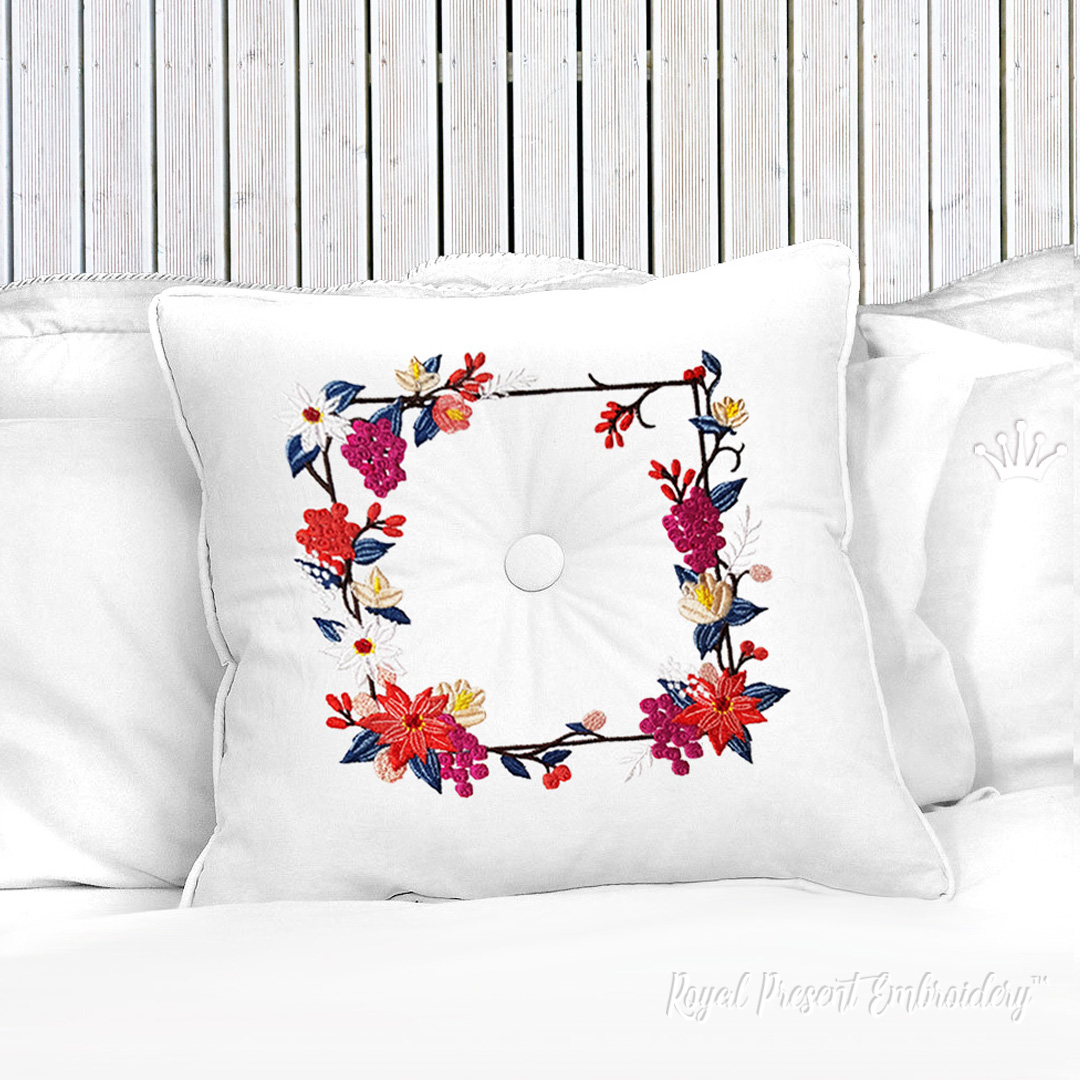
- Linen pillow: embroider the square frame in the center of the pillow front and pull the open center inward with a covered button.
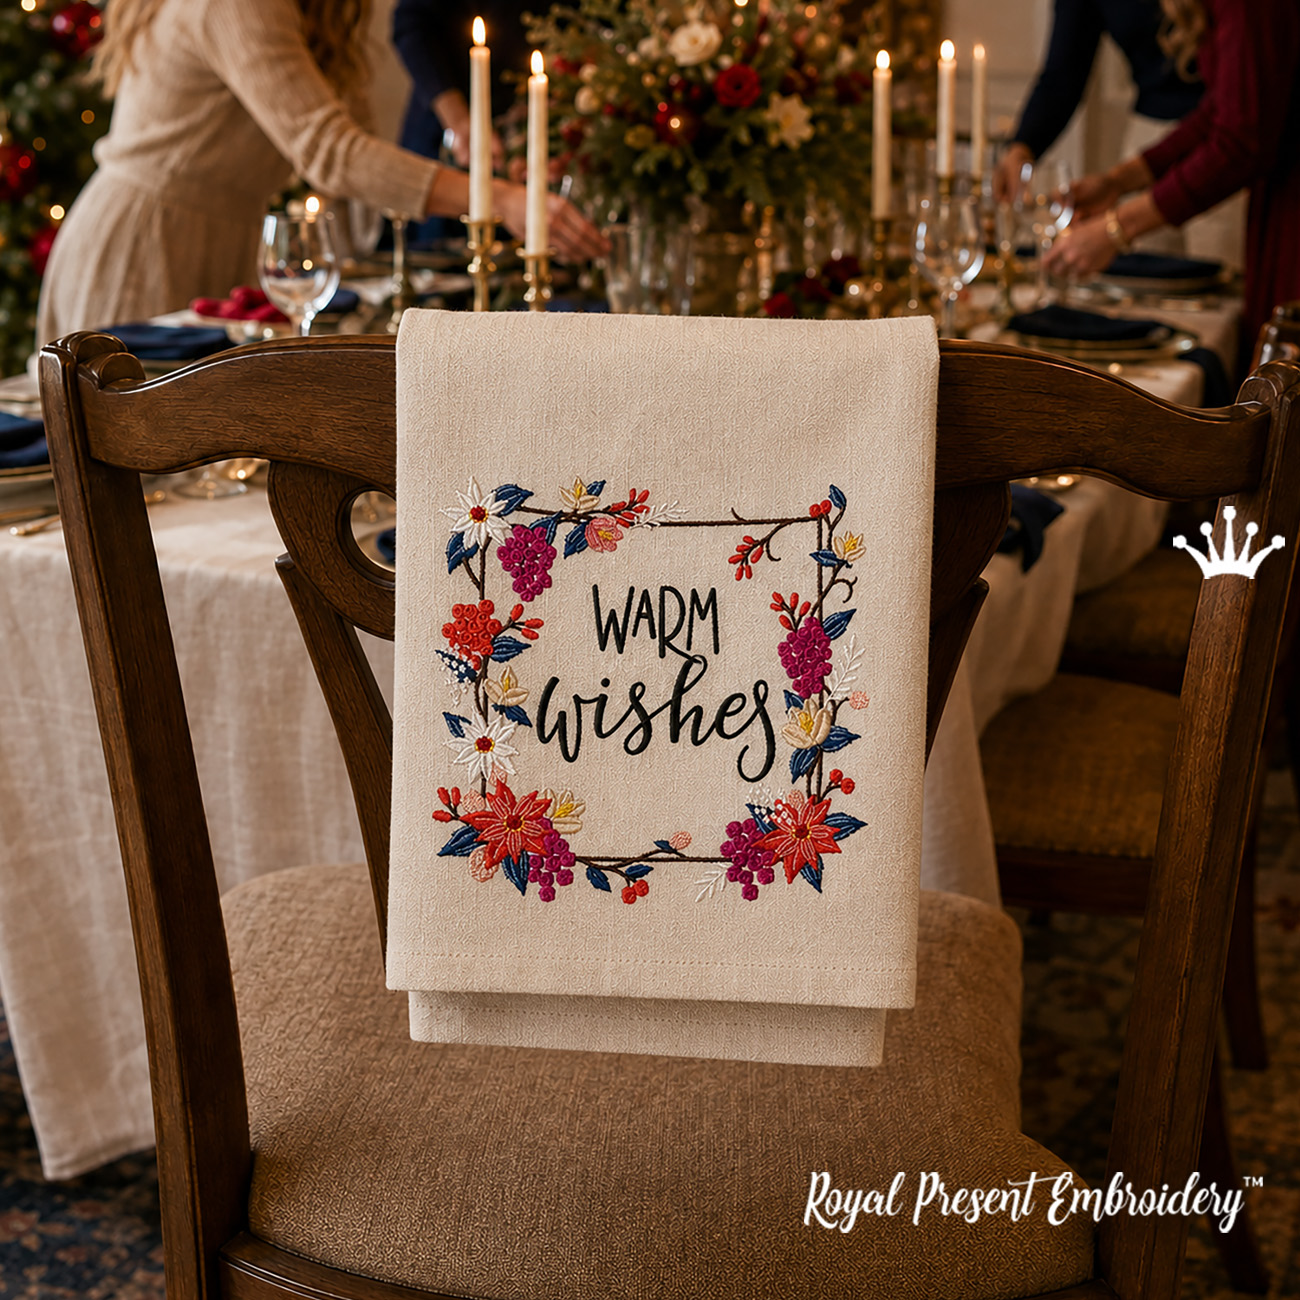
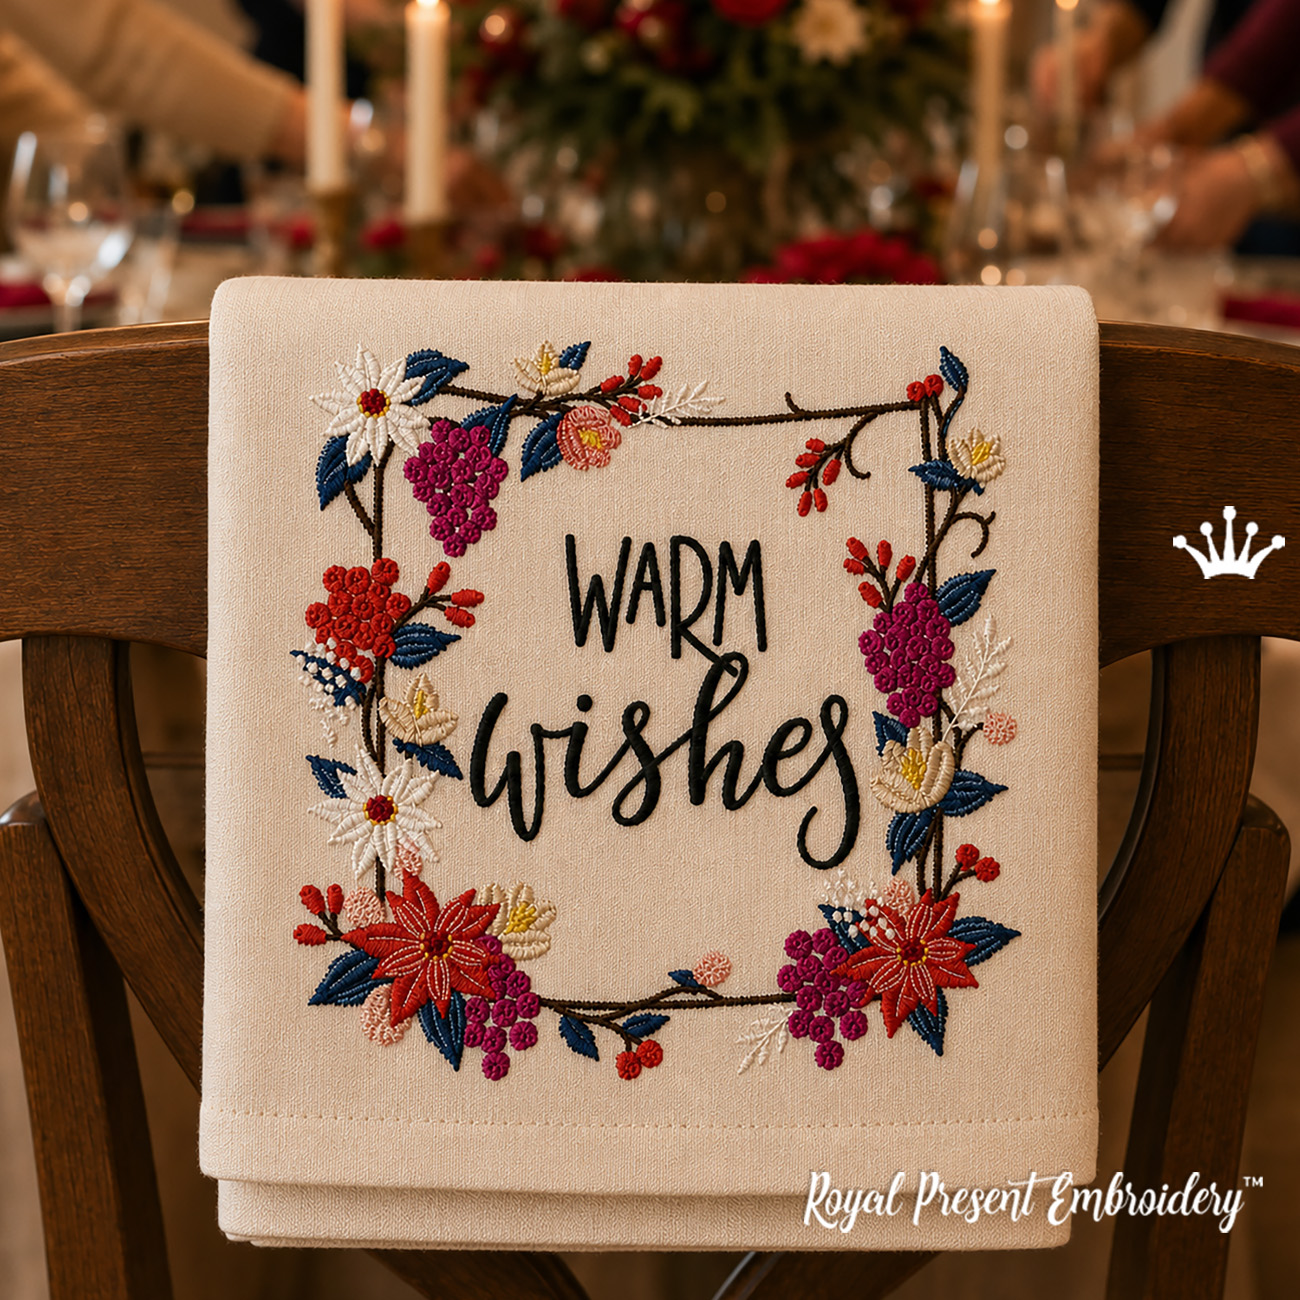
- Linen towel: place a Christmas inscription inside the open center of the frame.
- Holiday apron: position the embroidery around the pocket area. Whenever possible, embroider the apron panel before attaching the pocket.
- Christmas napkins and placemats: use the frame as a central decorative element for an elegant holiday table setting.
- Table topper: stitch one large frame in the center or arrange four smaller frames symmetrically.
How to embroider the linen pillow shown in the example
- Prewash and press the linen before marking or cutting the pillow front.
- Cut the front panel larger than the final pillow size. Embroider it before assembling the pillow cover.
- Mark the vertical and horizontal center lines with a removable fabric marker.
- For the first two design sizes, use a medium-weight fusible tear-away or firm tear-away stabilizer. For the three largest, high-stitch-count sizes, use a firm cut-away or two crossed layers of medium-weight tear-away.
- Hoop the linen without stretching or distorting the weave. The fabric should be smooth and firm, but not pulled drum-tight.
- After embroidery, remove the stabilizer according to its type and press the design from the wrong side over a folded towel.
- Assemble the pillow cover. Pass strong upholstery thread through the empty center of the frame and through a button on the back. Pull only until the desired tuft is formed.
- Do not pass the hand-sewing needle through dense embroidered areas. Use the unstitched center of the frame.
Find the inscription shown inside this frame:
Warm Wishes inscription - 3 sizes
Import the frame and inscription into the same embroidery-software layout and align both objects to the same center point. Preview the complete composition before saving it for the machine. Leave at least 3–5 mm (1/8–3/16 in) between the lettering and the nearest stitches of the floral frame.
Matching Christmas embroidery designs
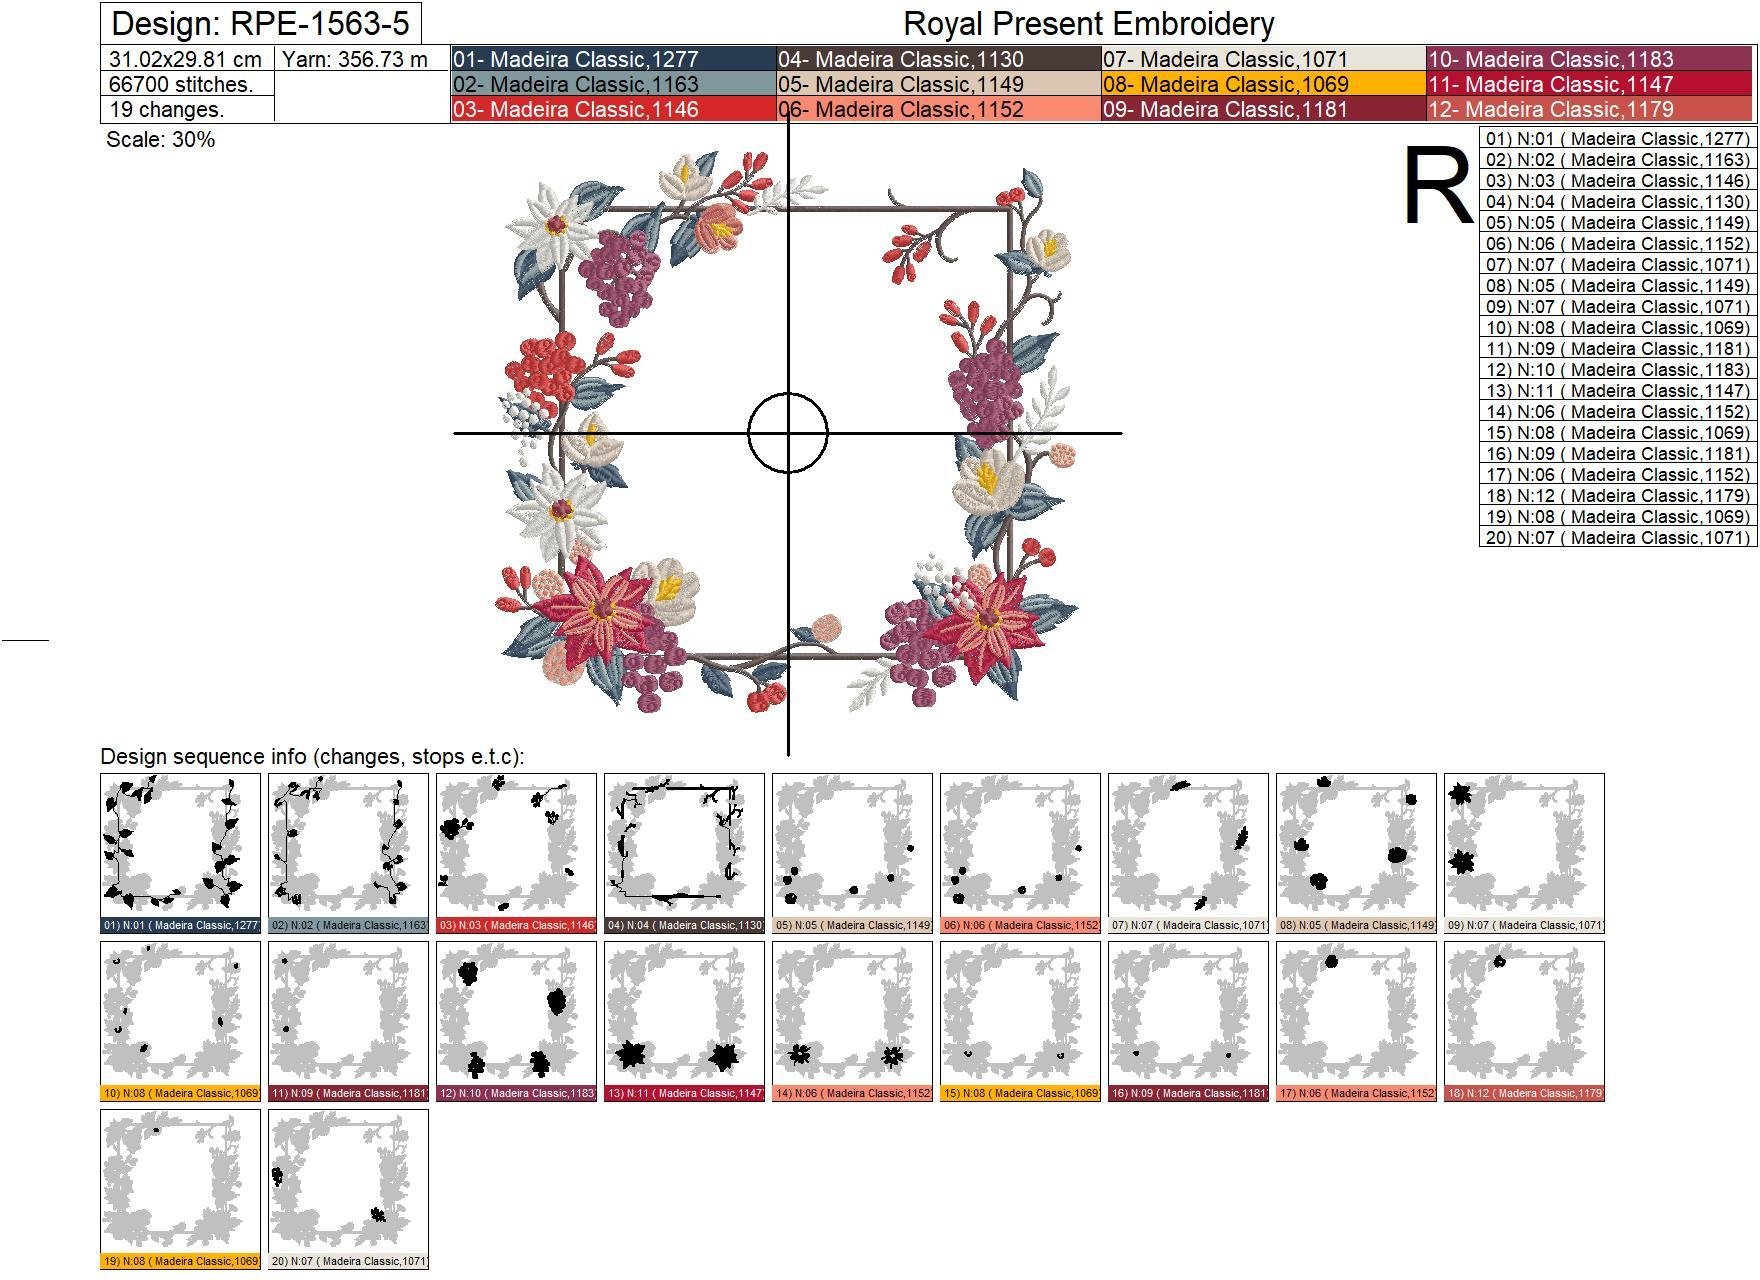
Color chart and embroidery sequence
This design uses 12 thread colors in 20 color blocks. Repeated colors are intentional because the stitching sequence controls layering, shading and clean overlaps. Do not combine repeated blocks automatically.
| Color |
Thread number |
Thread name |
Color blocks |
Embroidered elements |
| |
1277 |
Blueberry Smash |
1 |
Dark blue-gray leaf bases |
| |
1163 |
Steel Gray |
2 |
Leaf highlights and veins |
| |
1146 |
Tomato Red |
3 |
Red berries and buds |
| |
1130 |
Chocolate Chip |
4 |
Square frame, branches and stems |
| |
1149 |
Tusk |
5, 8 |
Cream petals and soft shadows |
| |
1152 |
Peach Tea |
6, 14, 17 |
Peach flowers, stripes and highlights |
| |
1071 |
Baby's Breath |
7, 9, 20 |
White flowers, berries, pale foliage and highlights |
| |
1024 |
Gold Rush |
10, 15, 19 |
Golden flower centers and accents |
| |
1181 |
Candy Apple Red |
11, 16 |
Deep-red shadows and petal bases |
| |
1183 |
Cranberry |
12 |
Cranberry-colored flower and berry details |
| |
1147 |
Christmas Red |
13 |
Main red poinsettia petals |
| |
1179 |
Sweet Potato |
18 |
Warm coral shading |
Complete color-block sequence: 1277 → 1163 → 1146 → 1130 → 1149 → 1152 → 1071 → 1149 → 1071 → 1024 → 1181 → 1183 → 1147 → 1152 → 1024 → 1181 → 1152 → 1179 → 1024 → 1071.
The displayed color squares are approximate screen representations. Use the thread numbers as the primary reference.
Consumer stabilizers for linen, cotton and holiday textiles
| Stabilizer |
Type |
Weight |
Recommended use |
Removal |
| Madeira Cotton Stable |
Fusible tear-away |
50 g/m² / 1.47 oz/yd² |
Stable linen, cotton pillow fronts, towels and table linens. The fusible coating helps prevent shifting of the linen weave. |
Tear away carefully after embroidery. |
| Madeira Cotton Soft |
Soft tear-away |
50 g/m² / 1.47 oz/yd² |
Firm woven cotton and linen when the back of the embroidery will remain visible. Use two crossed layers for a denser frame only after a test stitch. |
Tears away cleanly close to the stitching. |
| Madeira Cotton Fix |
Self-adhesive tear-away |
50 g/m² / 1.47 oz/yd² |
Finished aprons, difficult-to-hoop items and accurate placement around a pocket. |
Support the stitches with one hand while removing the stabilizer. |
| Madeira Super Strong |
Cut-away |
80 g/m² / 2.36 oz/yd² |
Large and mega-hoop sizes, loosely woven linen and projects with more than 50,000 stitches. |
Does not tear. Trim to approximately 6–10 mm (1/4–3/8 in) around the embroidery. |
| Floriani Medium Weight Firm Tearaway |
Firm tear-away |
50.9 g/m² / 1.50 oz/yd² |
Firm linen, cotton towels, napkins, placemats and other non-stretch woven textiles. |
Tears firmly and cleanly when the fabric is adequately supported. |
| Sulky Tear-Easy |
Light tear-away |
33 g/m² / 0.97 oz/yd² |
Lighter woven fabrics and test samples. For this full frame, use multiple layers only after testing. |
Tears easily; remove small sections gradually. |
| Vlieseline Stitch-n-Tear |
Tear-away |
40 g/m² / 1.18 oz/yd² |
Smaller frame sizes on stable cotton or closely woven linen. |
Tears away after the embroidery is complete. |
For terry cloth or fabric with a raised surface, add a water-soluble topping such as Madeira Avalon Film or Sulky Solvy on top. Topping keeps stitches from sinking into the pile, but it does not replace the supporting stabilizer underneath the fabric.
Temporary adhesive and clean machine embroidery
If the stabilizer is not self-adhesive, apply temporary spray adhesive lightly to the stabilizer away from the embroidery machine. Wait until it becomes tacky, then smooth the fabric into position. Do not spray the fabric, hoop, needle plate or the area around the machine. Excess adhesive can gum the needle and collect lint inside the hook area.
Important embroidery checks
- Check the actual embroidery field of your machine, not only the hoop name printed by the manufacturer.
- Run the machine's trace or outline function before starting.
- Do not overstretch linen while hooping; released tension can cause puckering after the fabric is removed.
- For napkins and reversible table linens, use a soft tear-away and a bobbin thread close to the visible embroidery colors.
- Test the selected size on a piece of the same fabric with the same stabilizer and thread.
- Use one of the supplied sizes instead of resizing a dense floral design automatically.
This is a digital machine embroidery file. Fabric, thread, pillow, buttons and other finished items are not included.

 Get Sign-In Link
 Login with Google
 Login with Facebook
 Login with Amazon
 Login with Paypal